Upgrade from 1x to 2x
UpdatedThis page details breaking changes from previous versions, so you understand the development effort required to update your app and take advantage of the latest features.
Versioning
We try to limit breaking or significant changes to major version increments. The three digits in our versioning scheme represent major, minor, and patch increments respectively.
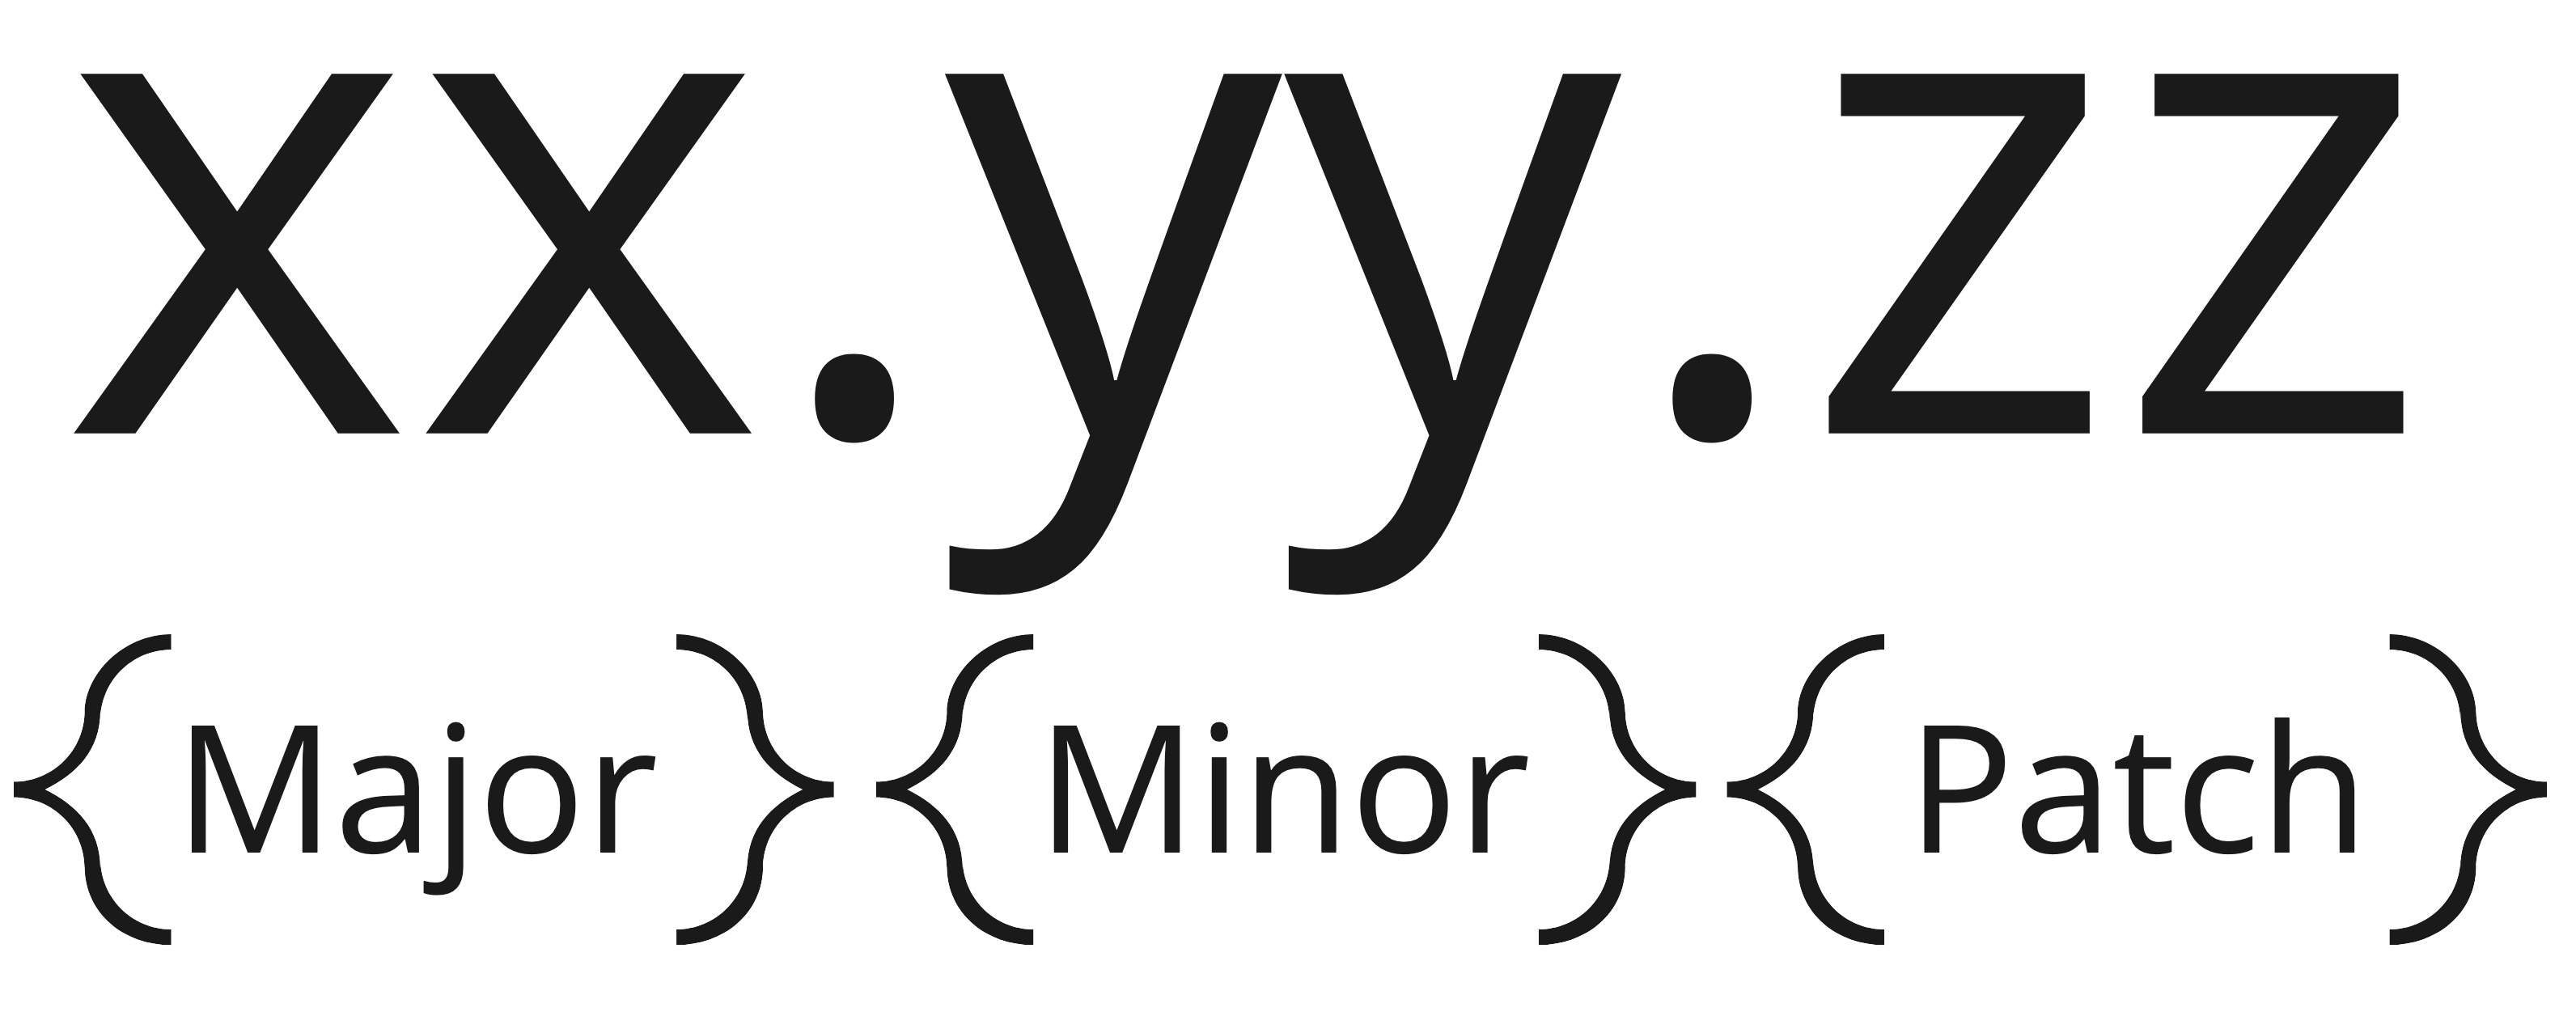

- Major: may include breaking changes, and generally introduces significant feature updates.
- Minor: may include new features and fixes, but won’t include breaking changes. You may still need to do some development to use new features in your app.
- Patch: Increments represent minor fixes that should not require development effort.
Upgrade from 1.x to 2.x
Singleton API is now enforced
In version 1.x of the Customer.io iOS SDK, could use the SDK in 2 ways:
- Singleton API:
CustomerIO.initialize(...) // initialize the singleton SDK instance
Customer.shared.track(...) // use the singleton SDK instance
- Non-singleton API:
let cio = CustomerIO(...) // initialize the non-singleton SDK instance
cio.track(...)            // use the non-singleton SDK instance
In version 2.x, we removed the non-singleton API. To successfully migrate, you need to replace any code using a non-singleton with the singleton instance:
// Replace the non-singleton instance:
cio.track(...)
messagingPush.application(...)
// With `CustomerIO.shared` or `MessagingPush.shared`:
CustomerIO.shared.track(...)
MessagingPush.shared.application(...)
If your app uses a technique like dependency injection, you can keep your code base as-is and simply replace code where you create new instances of the SDK:
// For example, if you have code that accepts a CustomerIO dependency in the constructor (to easily allow mocking the Customer.io SDK):
class Repository {
    let customerIO: CustomerIO

    init(customerIO: CustomerIO) {
        self.customerIO = customerIO
    }

    func acceptFriendRequest() {
        ...
        self.customerIO.track(...)
        ...
    }
}

// You can keep your Repository as-is, but you need to change where you create instances from:
let repository = Repository(customerIO: CustomerIO(...))
repository.acceptFriendRequest()
// To:
let repository = Repository(customerIO: CustomerIO.shared) // Don't forget to initialize the SDK 😉
repository.acceptFriendRequest()
Configuration of the SDK happens during initialization
In version 1.x of the Customer.io iOS SDK, you configured the SDK through a .config function:
CustomerIO.config {
  $0.autoTrackScreenViews = true
}
In version 2.x of the Customer.io iOS SDK, we moved the .config function into CustomerIO.initialize. You’ll need to move your configuration into the SDK initialization process to migrate:
CustomerIO.initialize(siteId: "YOUR SITE ID", apiKey: "YOUR API KEY", region: Region.EU) { config in
  config.autoTrackScreenViews = true
}
Visit the getting started doc to learn more about SDK configuration.
SDK initialization: required parameters
In version 1.x of the Customer.io SDK, the function CustomerIO.initialize contained optional parameters. We had to remove those and make all parameters required.
To migrate to 2.x of the SDK, fill in the rest of the parameters in your initialize function:
// v1.x
CustomerIO.initialize(siteId: "YOUR SITE ID", apiKey: "YOUR API KEY")

// v2.x
CustomerIO.initialize(siteId: "YOUR SITE ID", apiKey: "YOUR API KEY", region: Region.US) {}
// Optionally, if you want to configure settings of the SDK, do so in initialization.
CustomerIO.initialize(siteId: "YOUR SITE ID", apiKey: "YOUR API KEY", region: Region.EU) { config in
  config.autoTrackScreenViews = true
}
Visit the getting started doc to learn more about SDK configuration.
Rich push initialization
If you have followed our docs to setup rich push in your app, you should have a Notification Service Extension file in your code base.
Because of the behavior of Notification Service Extensions in iOS, you need to initialize the Customer.io SDK in your host app and in your Notification Service.
class NotificationService: UNNotificationServiceExtension {

    override func didReceive(
        _ request: UNNotificationRequest,
        withContentHandler contentHandler: @escaping (UNNotificationContent) -> Void
    ) {
        // Make sure to initialize the SDK at the top of this function.
        CustomerIO.initialize(siteId: "YOUR SITE ID", apiKey: "YOUR API KEY", region: Region.US) { config in
            config.autoTrackPushEvents = true
        }
        ...
    }
}
See our docs for rich push to learn more about rich push setup, SDK initialization, and SDK configuration.
Cocoapods users must manually install Firebase dependencies
We removed all Firebase SDKs as dependencies from the CustomerIO/MessagingPushFCM Cocoapod. This means that you need to install the Firebase Cloud Messaging (FCM) dependencies in your Podfile on your own.
If you installed the Customer.io SDK using Swift Package Manager, this change does not effect you.
We fixed a bug with custom attributes that may impact your data
SDK functions that let you send custom data—trackEvent, screen, identify and deviceAttribute calls—may have been impacted by a bug in v1 that converted keys in your custom data to snake_case. This bug is fixed in v2 of the iOS SDK. You will see your data in Customer.io exactly as you pass it to the SDK.
This bug didn’t surface with all data; it did not affect you if you already snake-cased your data; and it did not affect our Android SDK..
// If you passed in custom attributes using camelCase keys:
data = ["firstName": "Dana"]
// The SDK v1 may have converted this data into:
data = ["first_name": "Dana"]

// Or, if you used a different format that was not snake_case:
data = ["FIRSTNAME": "Dana"]
// The SDK v1 may have converted this data into:
data = ["f_irstname": "Dana"]
You don’t need to do anything before you update. But we strongly recommend that you go to Data & Integrations > Data Index and audit your attributes and events to determine if the v1 SDK reshaped your data. Make sure that updating to the 2.x SDK won’t impact your segments, campaigns, etc by sending data in a different (but expected) format to Customer.io.
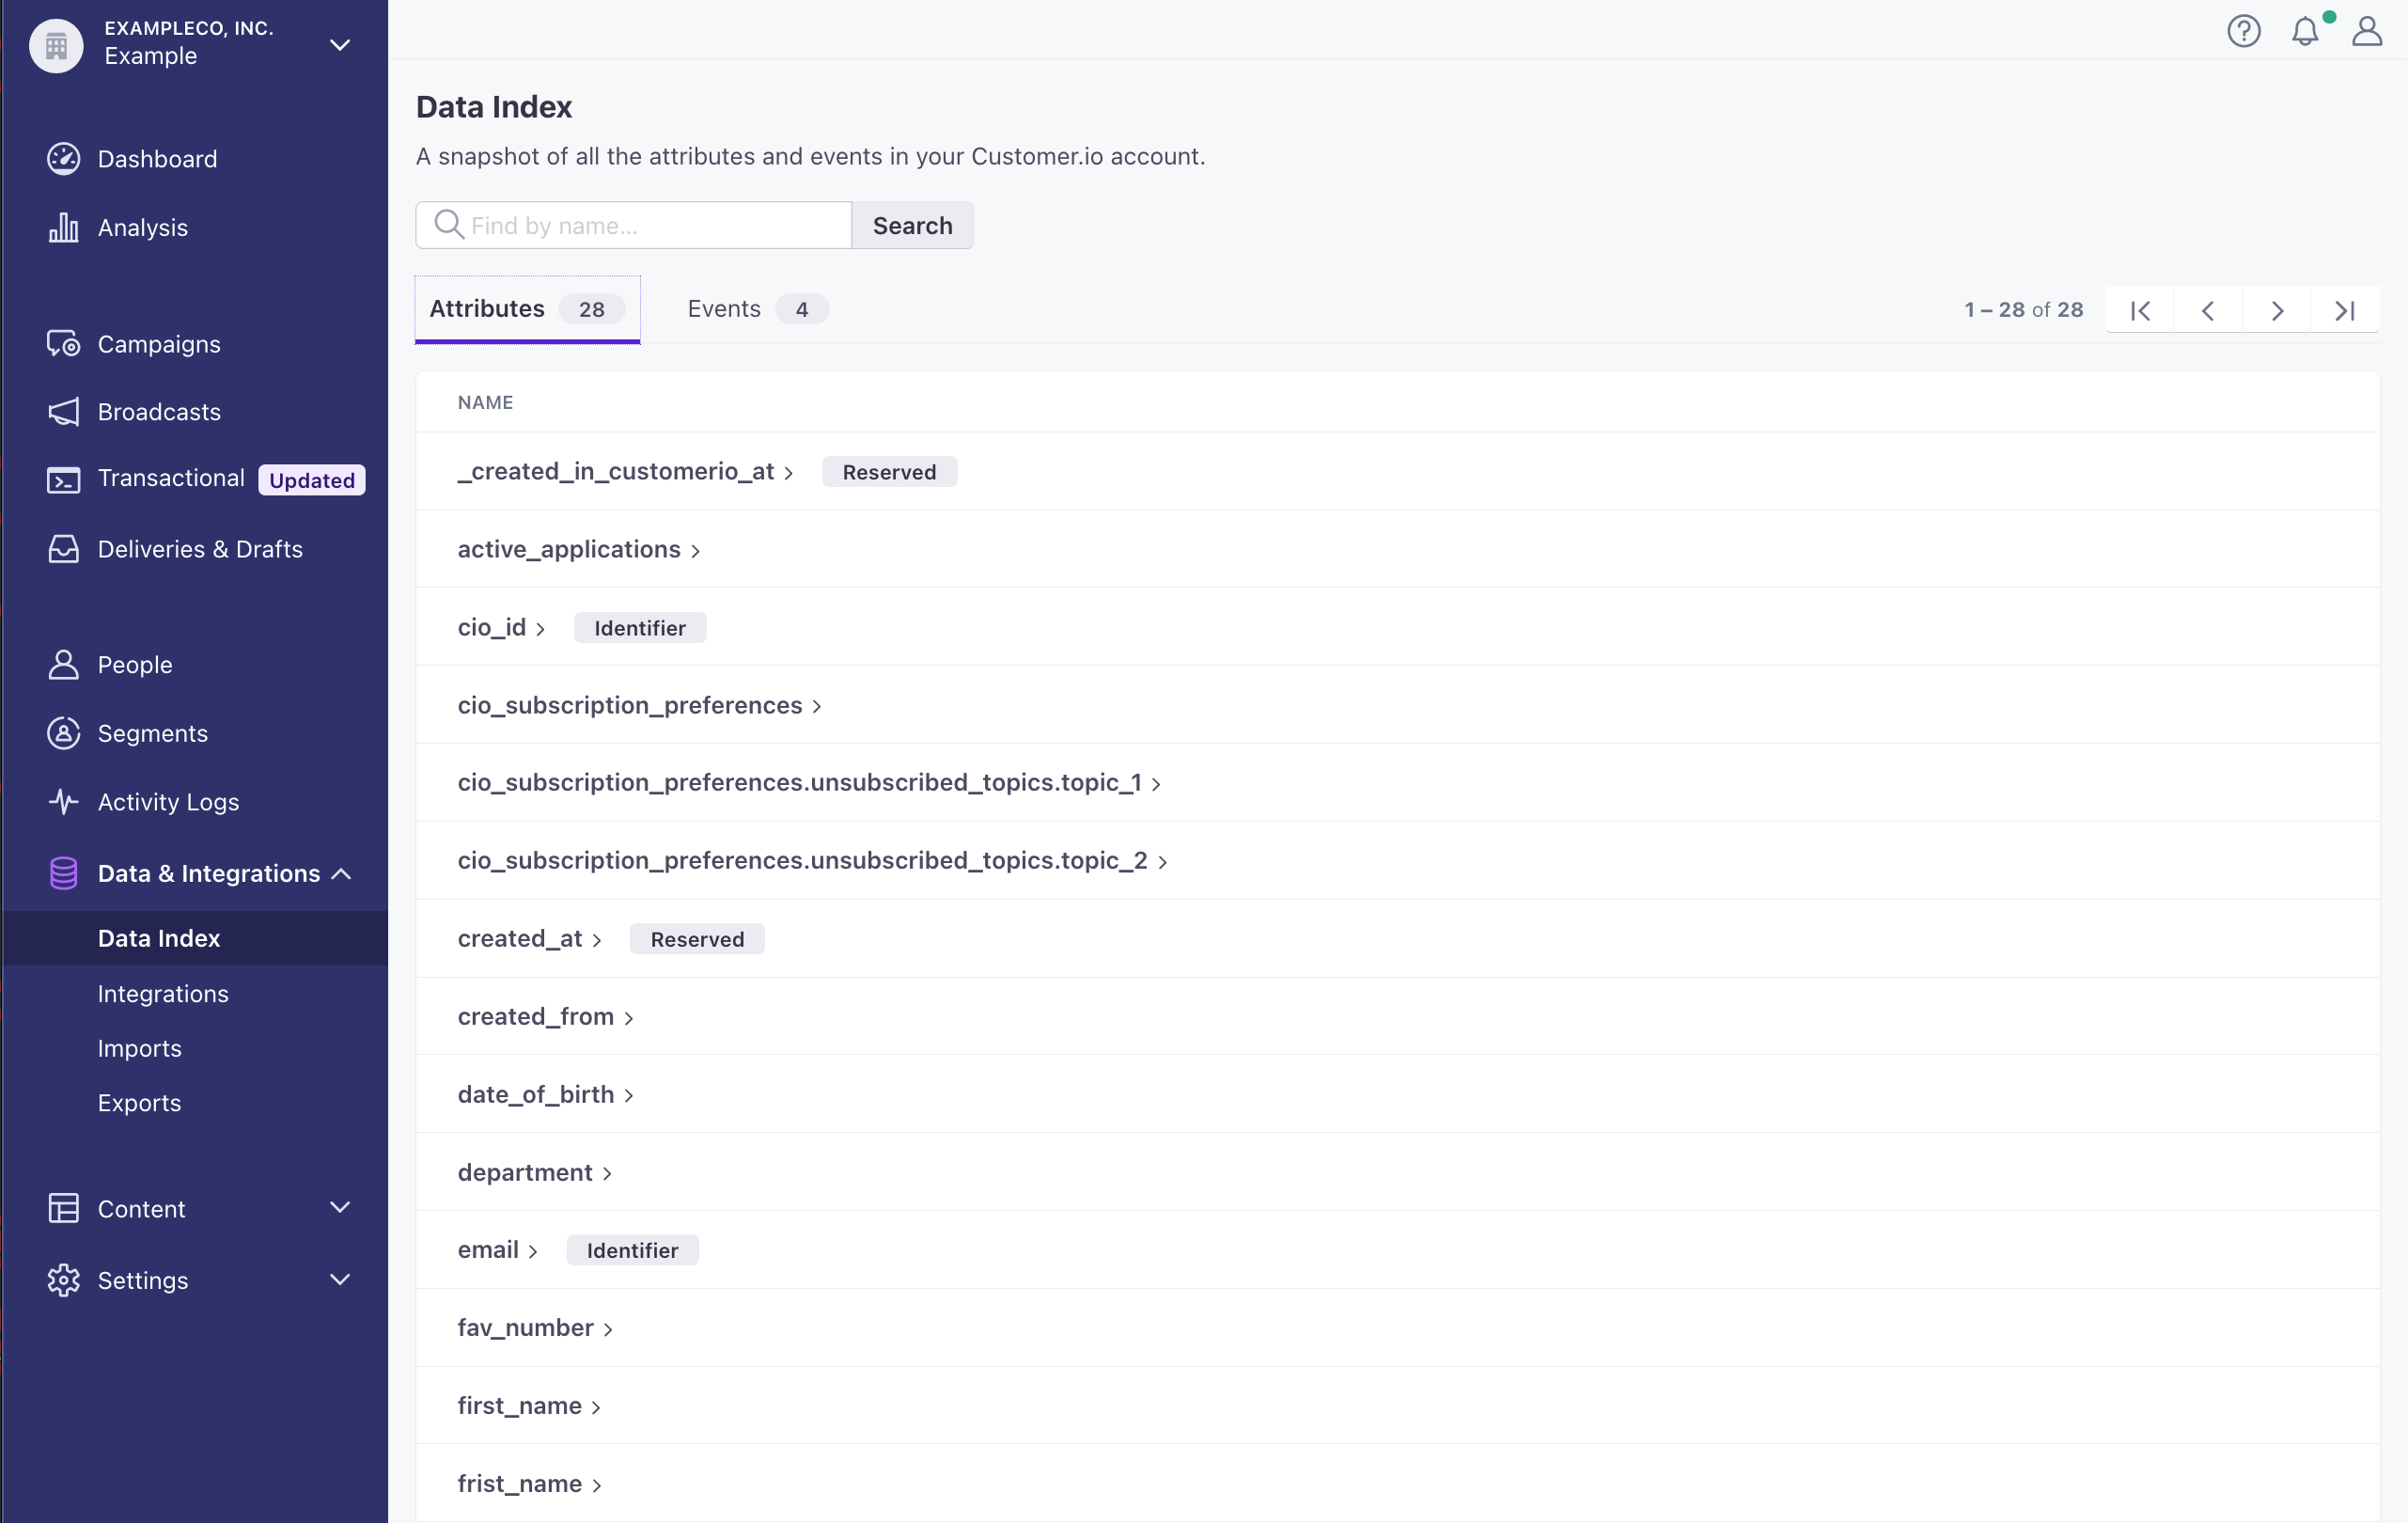

If your data was affected, you can either:
- (Recommended) Update your attributes, segments, and other information stored in Customer.io to use your original data format.
- Set your app to continue using the snake-cased data passed by the 1.x SDK.
Option 1 (Recommended): Update your data in Customer.io
For Events: trackEvent and screen calls
Unfortunately, you can’t modify past events sent by trackEvent or screen calls. But, before you move forward with the 2.0 SDK, you can can update your segments, campaigns, and other Customer.io assets to use your original, not-reshaped data format.
For segmentsA group of people who match a series of conditions. People enter and exit the segment automatically when they match or stop matching conditions., you should use OR conditions with the bugged, snake-cased format and your preferred data format. This ensures that people enter your segments and campaigns whether they use your app with the 1.x or 2.x SDKs.


For Attributes: identify, profileAttributes, and deviceAttribute calls
If your customer data was inappropriately snake-cased by the v1 SDK, you can set up a campaign to apply correctly formatted attributes in Customer.io so you don’t need to update your app! If you update your data this way, you may still need to update segments and other assets to use the correct data shape.
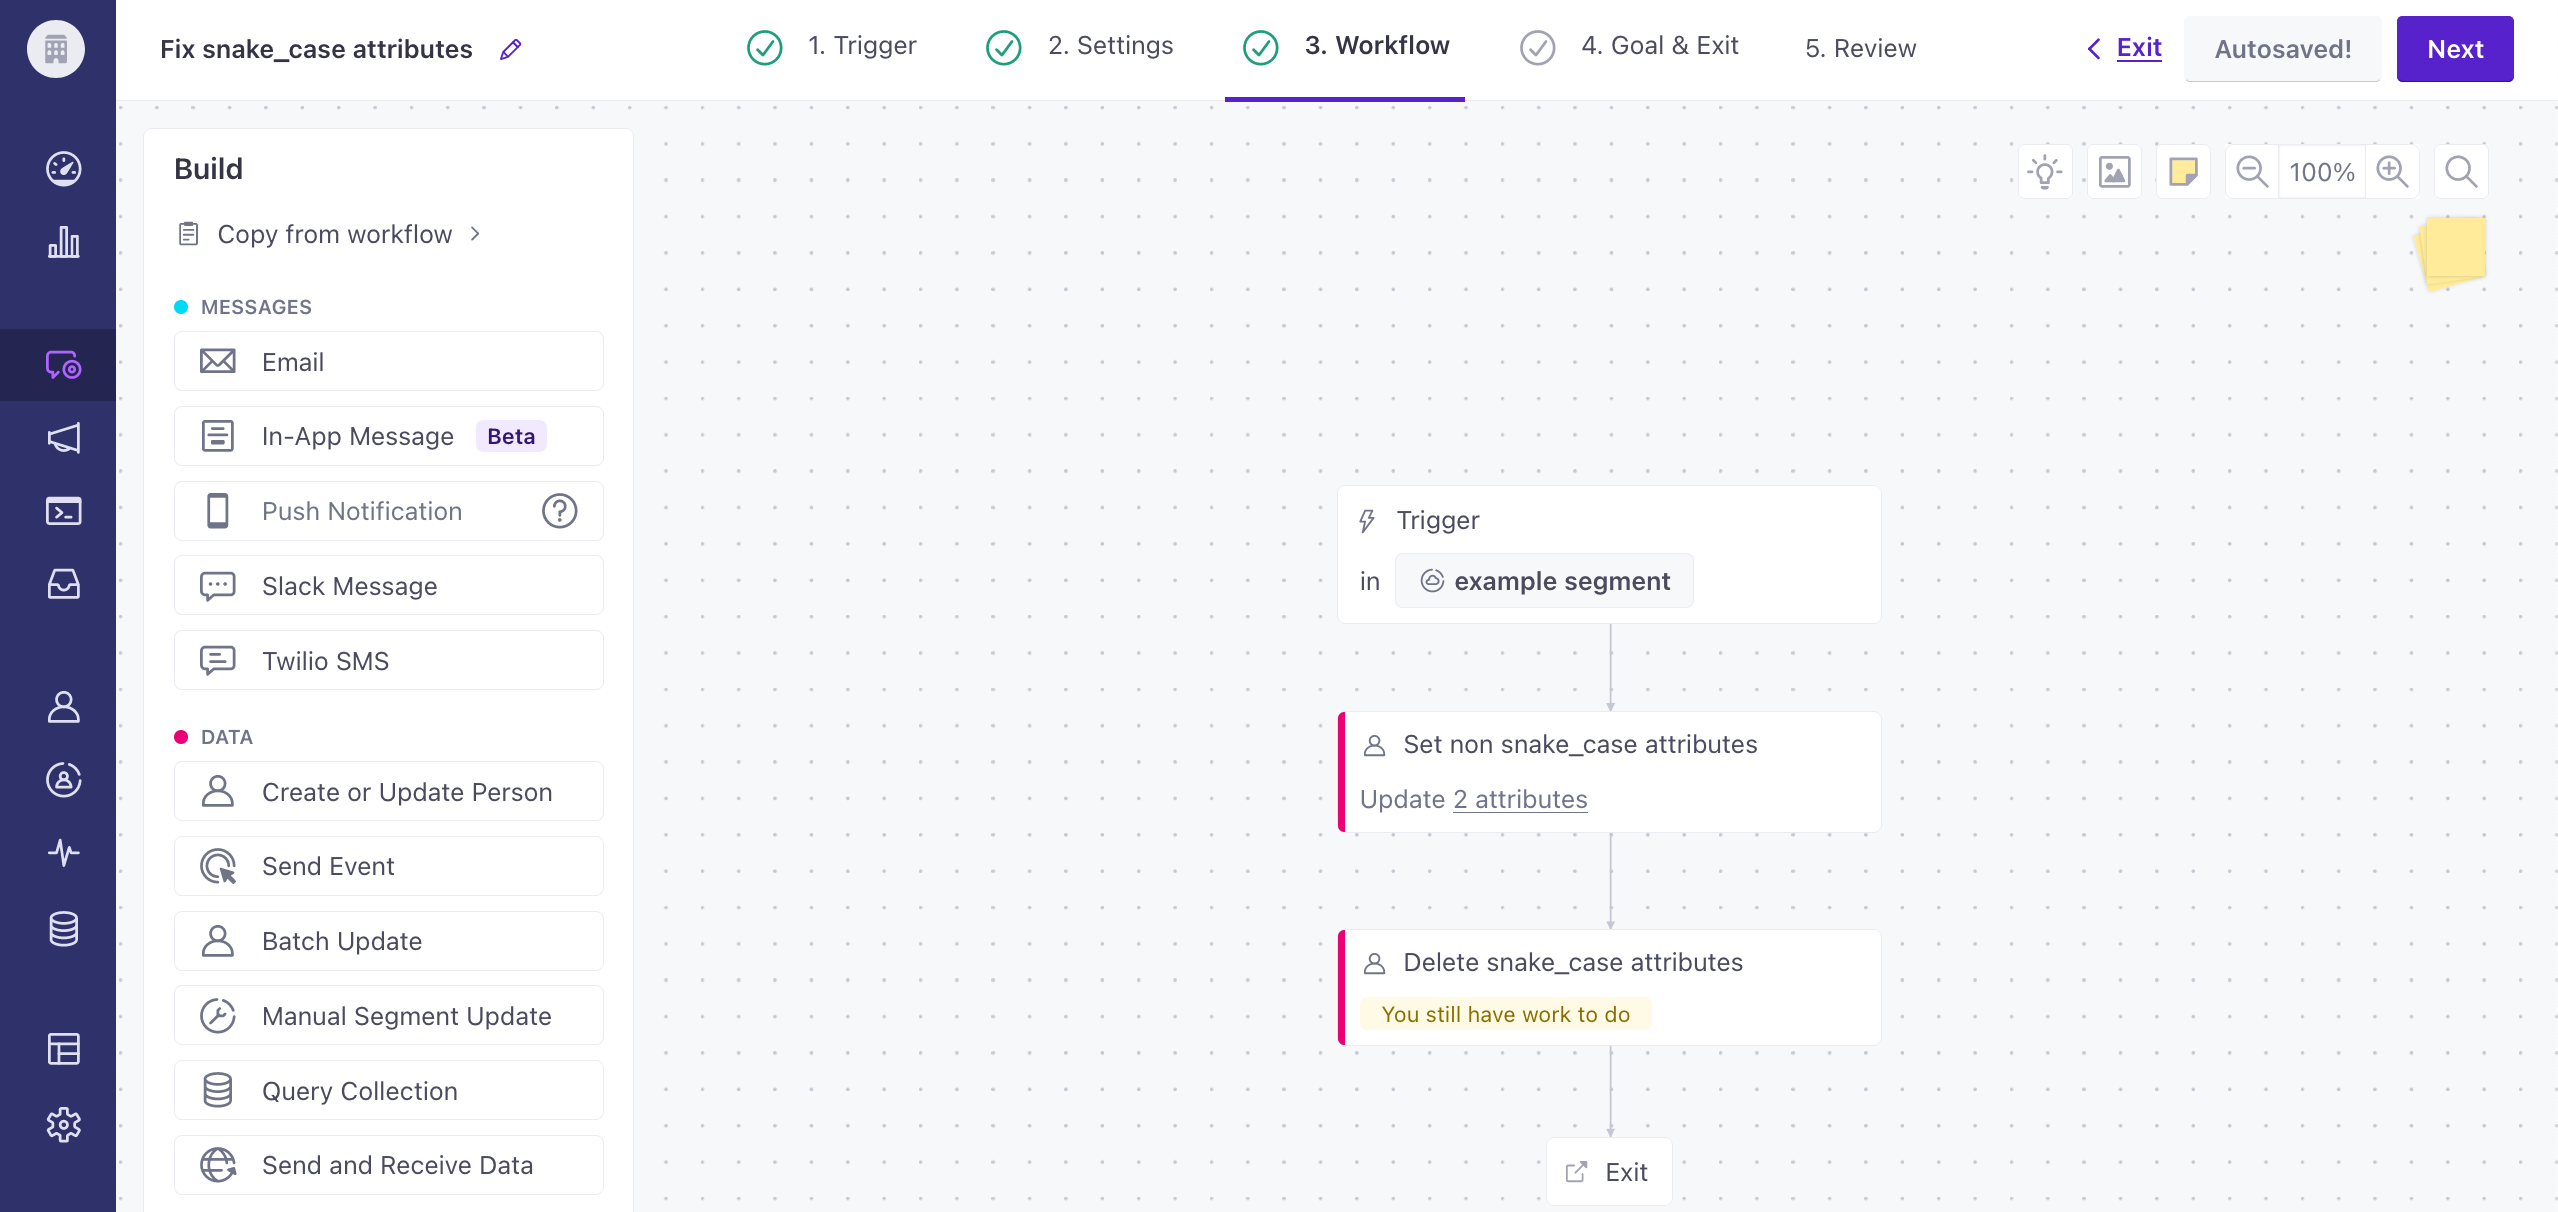
Create a segment of people possessing the affected, snake-cased attributes.
Create a campaign using this segment as a trigger.
Configure the first action to set correctly formatted attributes using the values from your previously-misshaped attributes. Use liquid to identify the attributes in question. Use a liquid or JS if statement to set an attribute value if it exists, otherwise your campaign may experience errors.
{% if customer.snake_case %}{{customer.snake_case}}{% endif %}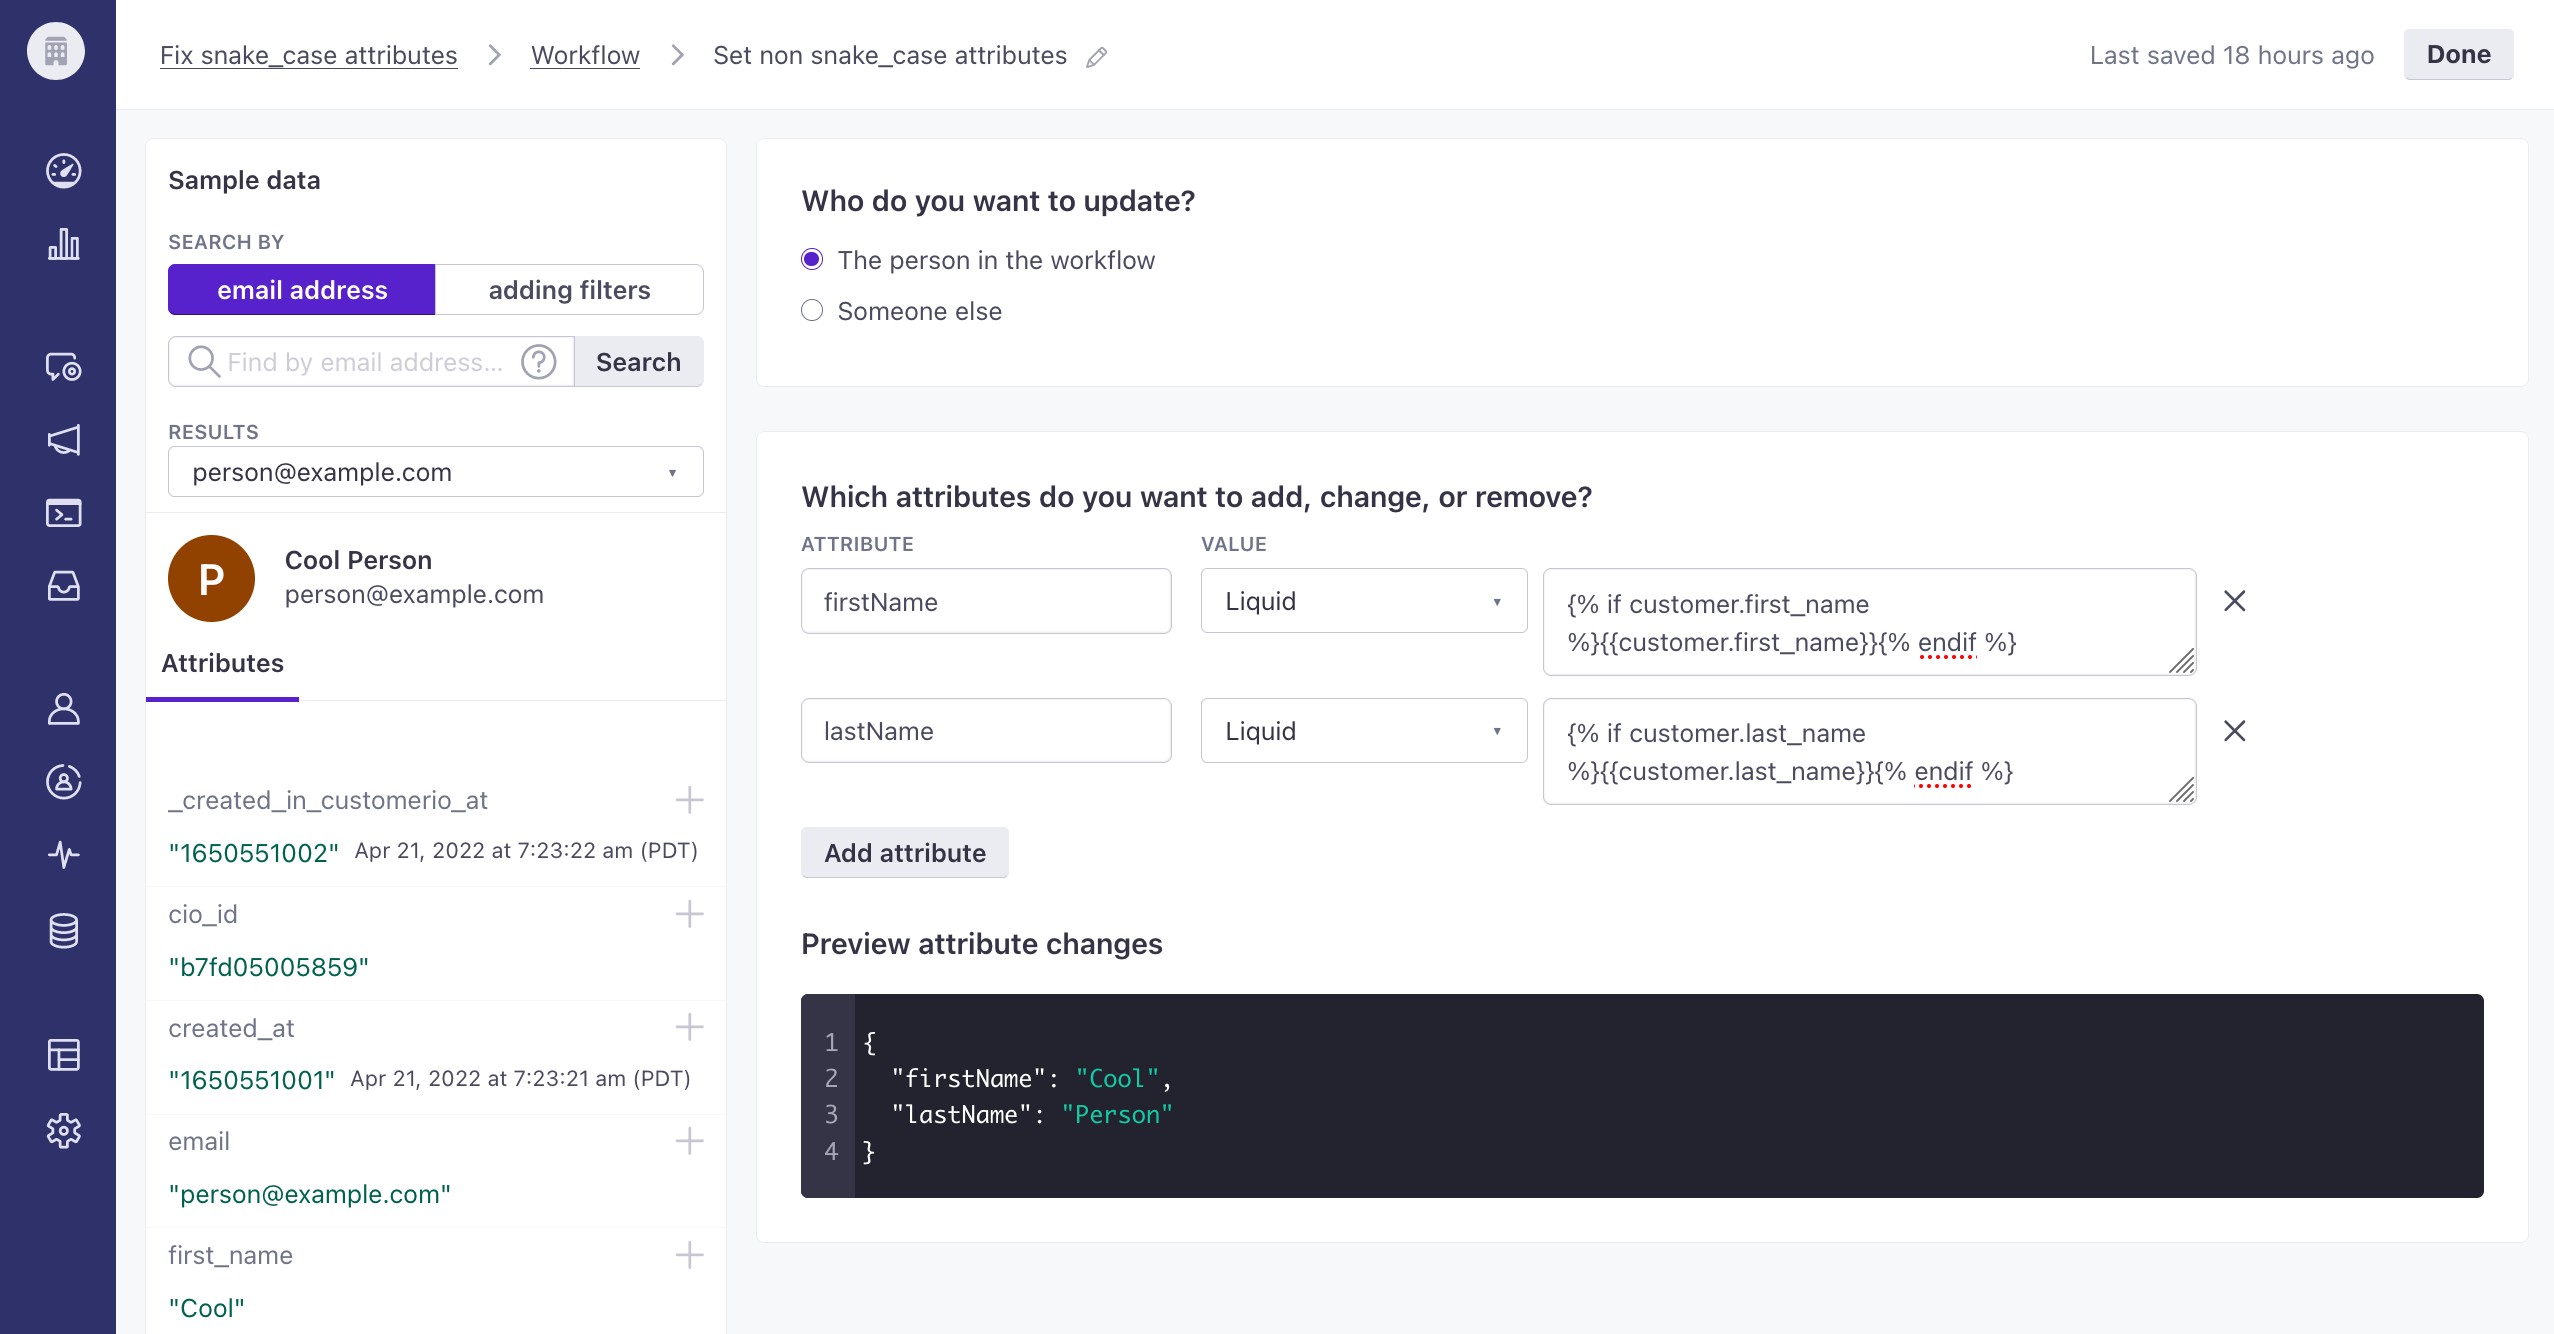

Configure the second Create or Update Person action to remove the bugged, snake-case attributes from your audience.
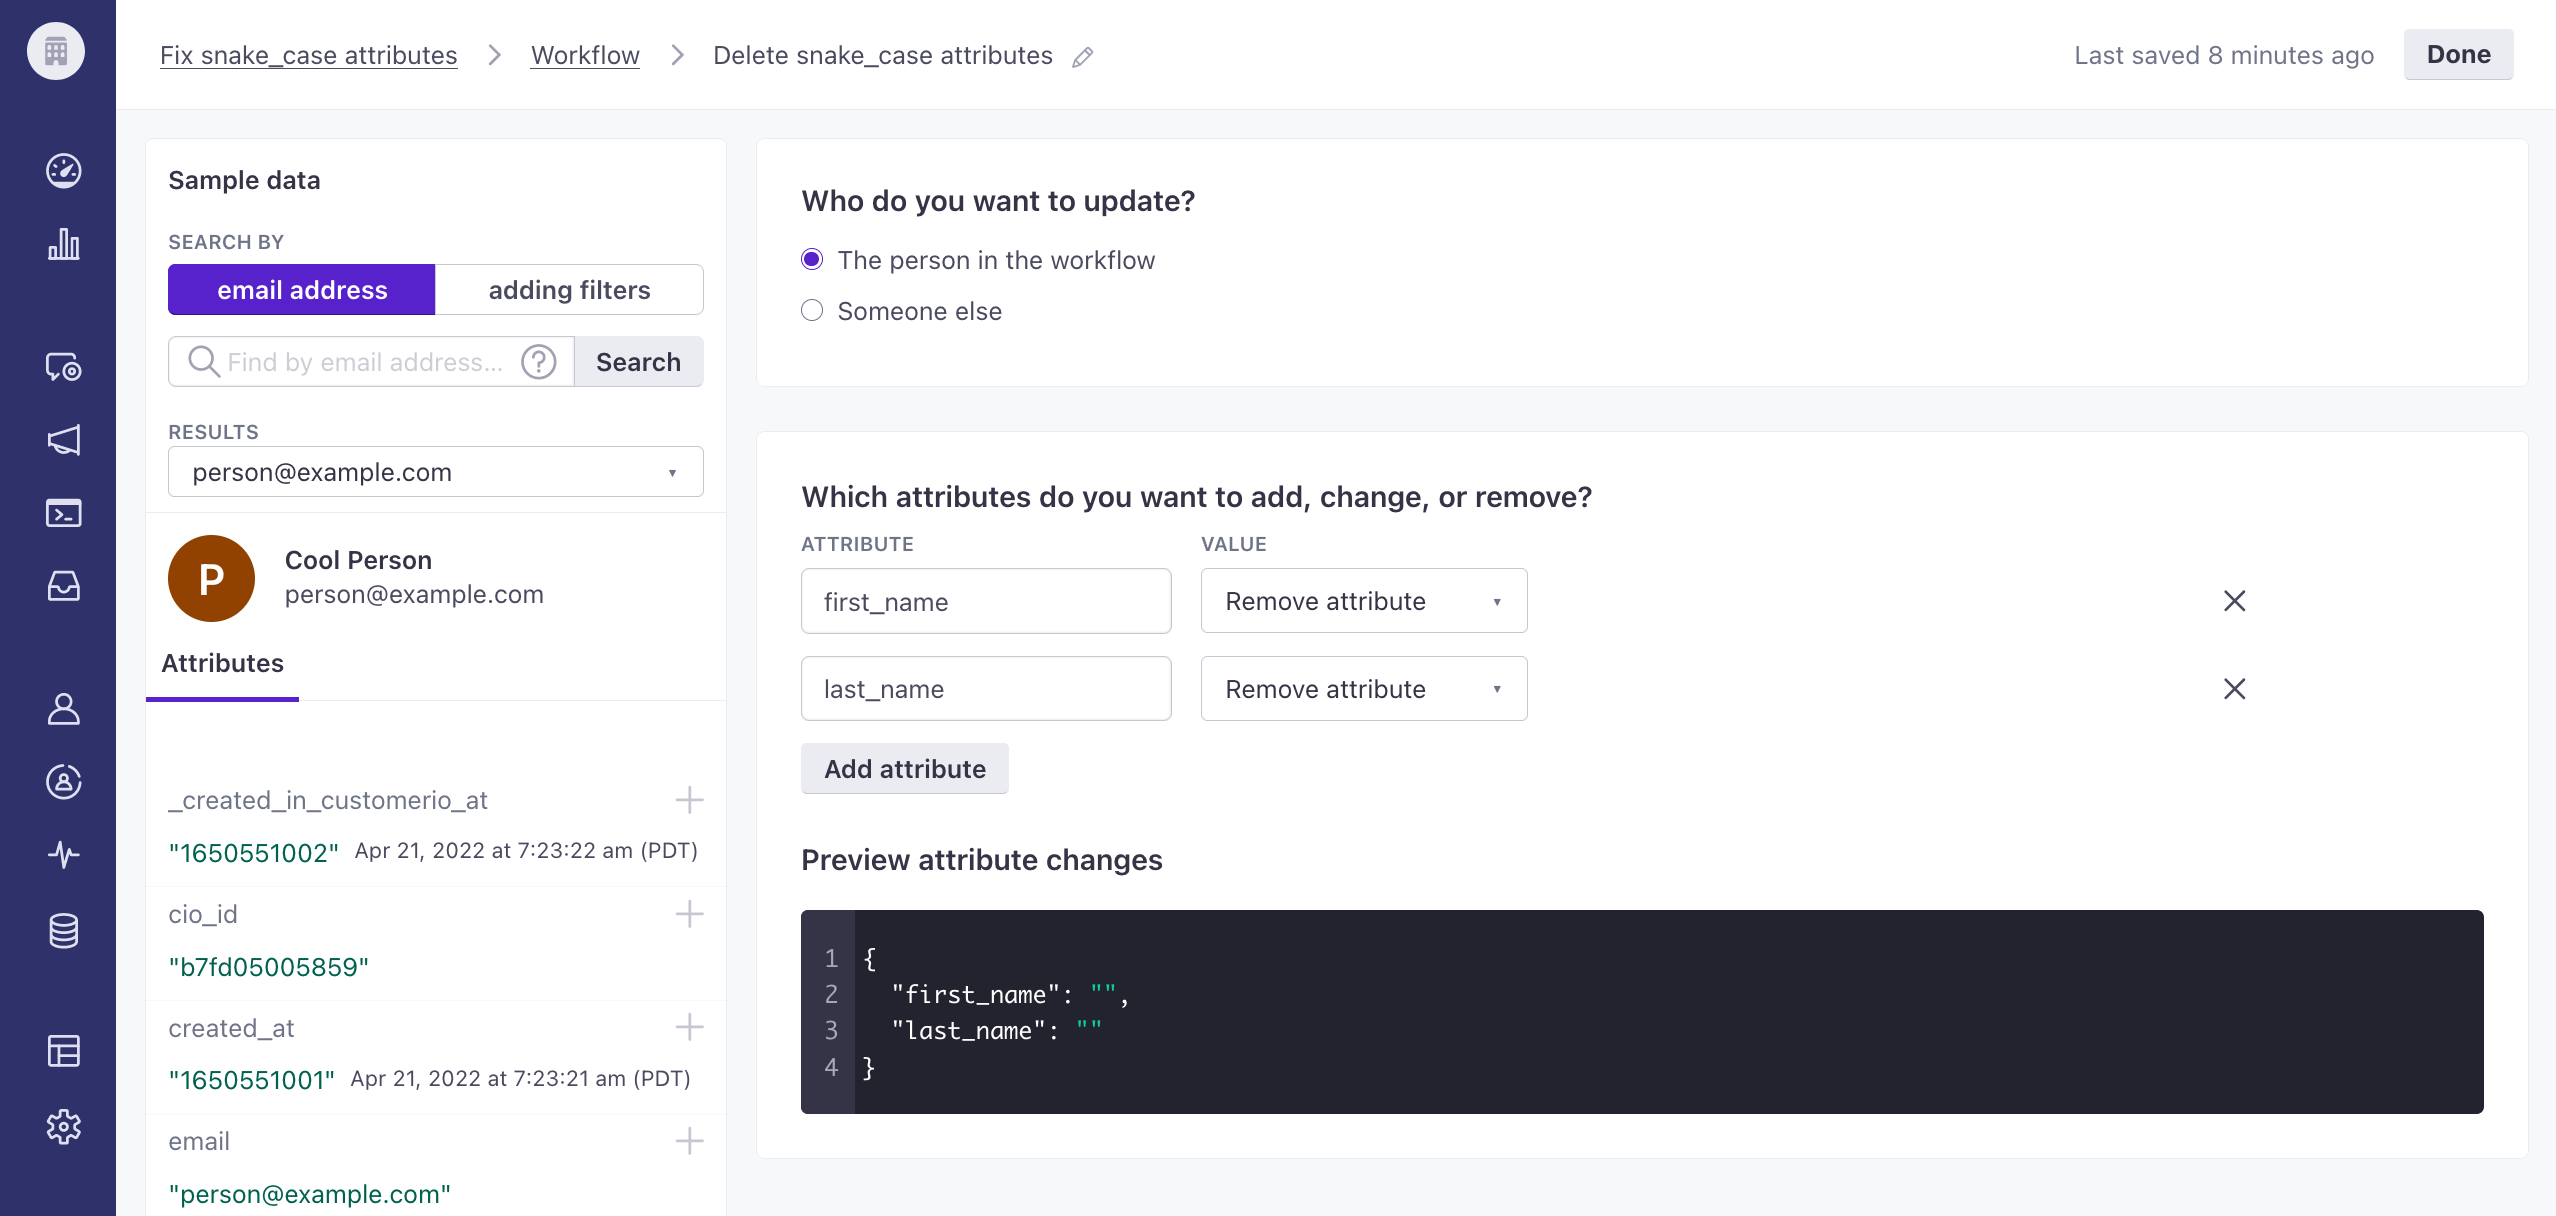

Make sure that your segmentsA group of people who match a series of conditions. People enter and exit the segment automatically when they match or stop matching conditions., filters, and other items that might be based on people’s attributes or device attributes are all set to use your preferred format.
Option 2: Use snake-cased formats in your app
// Anywhere you call the Customer.io SDK and provide custom attributes like this:
CustomerIO.shared.identify("dana@example.com", data: ["firstName": "Dana"])

// Consider sending duplicate data with snake_case
CustomerIO.shared.identify("dana@example.com", data: [
    "firstName": "Dana", // Attribute used with v1 of the SDK that got converted to snake_case. Keeping it here as the bug has been fixed.
    "first_name": "Dana" // Adding this duplicate attribute for backwards compatibility with customers using old versions of your app.
])
Then, after you have determined that all of your app’s customers have updated their app to a version of your app no longer using v1 of the Customer.io SDK, you can remove this duplication:
CustomerIO.shared.identify("dana@example.com", data: [
    "firstName": "Dana", // We can remove the snake_case attribute and go back to just camelCase!
])
