Snowflake
UpdatedImport people, objects, and relationships from a Snowflake database. This reverse ETL integration makes sure that people in your workspace reflect the latest information from your CRM or other backend system.
A "reverse ETL" integration extracts, transforms, and loads data from your Snowflake database to your workspace. With this integration, you can automatically add or update people, objects, and their relationships in Customer.io from your database on a recurring interval.
When you set up your integration, you can import people or objects—you cannot import both with the same query. In either case, you can also use a separate "relationships" query to set relationships between people and objects—relative to the thing you import. So, if you import people, you set relationships to objects; if you import objects, you relate them to people.
When you sync people, you can also add people to, or update people in, a manual segment. This helps you trigger campaigns automatically based on changes from each sync interval.
Requirements
As a part of setup, you’ll need to provide the credentials of a database user with read-access to the tables you want to select data from.
If you use a firewall or an allowlist, you must allow the following IP addresses (corresponding to your account region—US or EU), so that we can connect to your database.
| Account region | IP Address |
|---|---|
| US | 34.122.196.49 |
| EU | 104.155.37.221 |
Query Requirements
When you set up a reverse ETL integration, you provide a query selecting the people and columns you want to import. Each row returned from your query is a person you’ll add or update in Customer.io; each column is an attribute that you’ll set for the people you add or update.
While we support queries that return millions of rows and hundreds of columns, syncing large amounts of data more then once a day can impact your account’s performance—including delaying campaigns or messages. When you set up your query, consider how much data you want to send and how often; and make sure you optimize your query with a last_sync_time.
Your query must:
Use
asto map columns to lowercase attributes likeid,email, andobject_id. Because Snowflake column names are all caps, and our required attributesA key-value pair that you associate with a person or an object—like a person’s name, the date they were created in your workspace, or a company’s billing date etc. Use attributes to target people and personalize messages. Attributes are analogous to traits in Data Pipelines. are lowercase, you must useasor your query will fail in Customer.io.SELECT ID as "id", EMAIL as "email" from MY_TABLEFor People: your query must select at least one column representing a person’s identifier—
emailand/orid, depending on your workspace settings. Because Snowflake column names are in all caps, you must convert them to lowercase usingASto import data—SELECT ID AS id.For Objects: your query must select a column representing an
object_id. If your query doesn’t include anobject_type, we assume that theobject_typeis 1—your first or original object type.For Relationships: your query must contain one column representing
object_idand one representing an ID or email for people. Each Row represents a relationship.
Best Practices
Before you add this integration, you should take some measures to ensure the security of your customers’ data and limit performance impacts to your backend database. The following “best practice” suggestions can help you limit the potential for data exposure and minimize performance impacts.
Create a new database user. You should have a database user with minimal privileges specifically for Customer.io import/sync operations. This person only requires read permissions with access limited to the tables you want to sync from.
Do not use your main database instance. You may want to create a read-only database instance with replication in place, lightening the load and preventing data loss on your main instance.
Sync only the data that you’ll use in Customer.io. Limiting your query can improve performance, and minimizes the potential to expose sensitive data. Select only the columns you care about, and make sure you use the
{{last_sync_time}}to limit your query to data that changed since the previous sync.Limit your frequency so you don’t sync more than necessary, overloading your database and Customer.io workspace. If the previous sync is still in progress when the next interval occurs, we’ll skip the operation and catch up your data on the next interval. Frequently skipped operations may indicate that you’re syncing too often. You should monitor your first few syncs to ensure that you haven’t impacted your system’s security and performance.
Observe regional data regulations. Your data in Customer.io is stored in your account region—US or EU. If your database resides in Europe, but your Customer.io account is based in the US, GDPR and other data regulations may apply. Before you connect your database to Customer.io, make sure that you’re abiding by your regional data regulations.
Sending excessive data can impact your account’s performance
While we support queries that return millions of rows and hundreds of columns, returning large data sets more then once a day can impact your account’s performance. When you set up your query, consider how much data you want to send and how often; and make sure you optimize your query with a last_sync_time.
Add a sync
When you set up a sync, you’ll choose whether you want to import People or objectsNot to be confused with a JSON object, an object in Customer.io is a non-person entity that you can associate with one or more people—like a company, account, or online course. You can use objects to message people based on changes to their company, account, or course itinerary.. If you want to import both, you’ll need to set up multiple syncs. But, after you configure a database, your database information persists, making it easy to set up subsequent database sync operations.
If you use a firewall or an allowlist, you must allow the following IP addresses (corresponding to your account region—US or EU), so that we can connect to your database.
| Account region | IP Address |
|---|---|
| US | 34.122.196.49 |
| EU | 104.155.37.221 |
Go to Data & Integrations > Integrations and select Snowflake Data In. You can search for your database type or click Databases to find it.
- Click Set up sync.
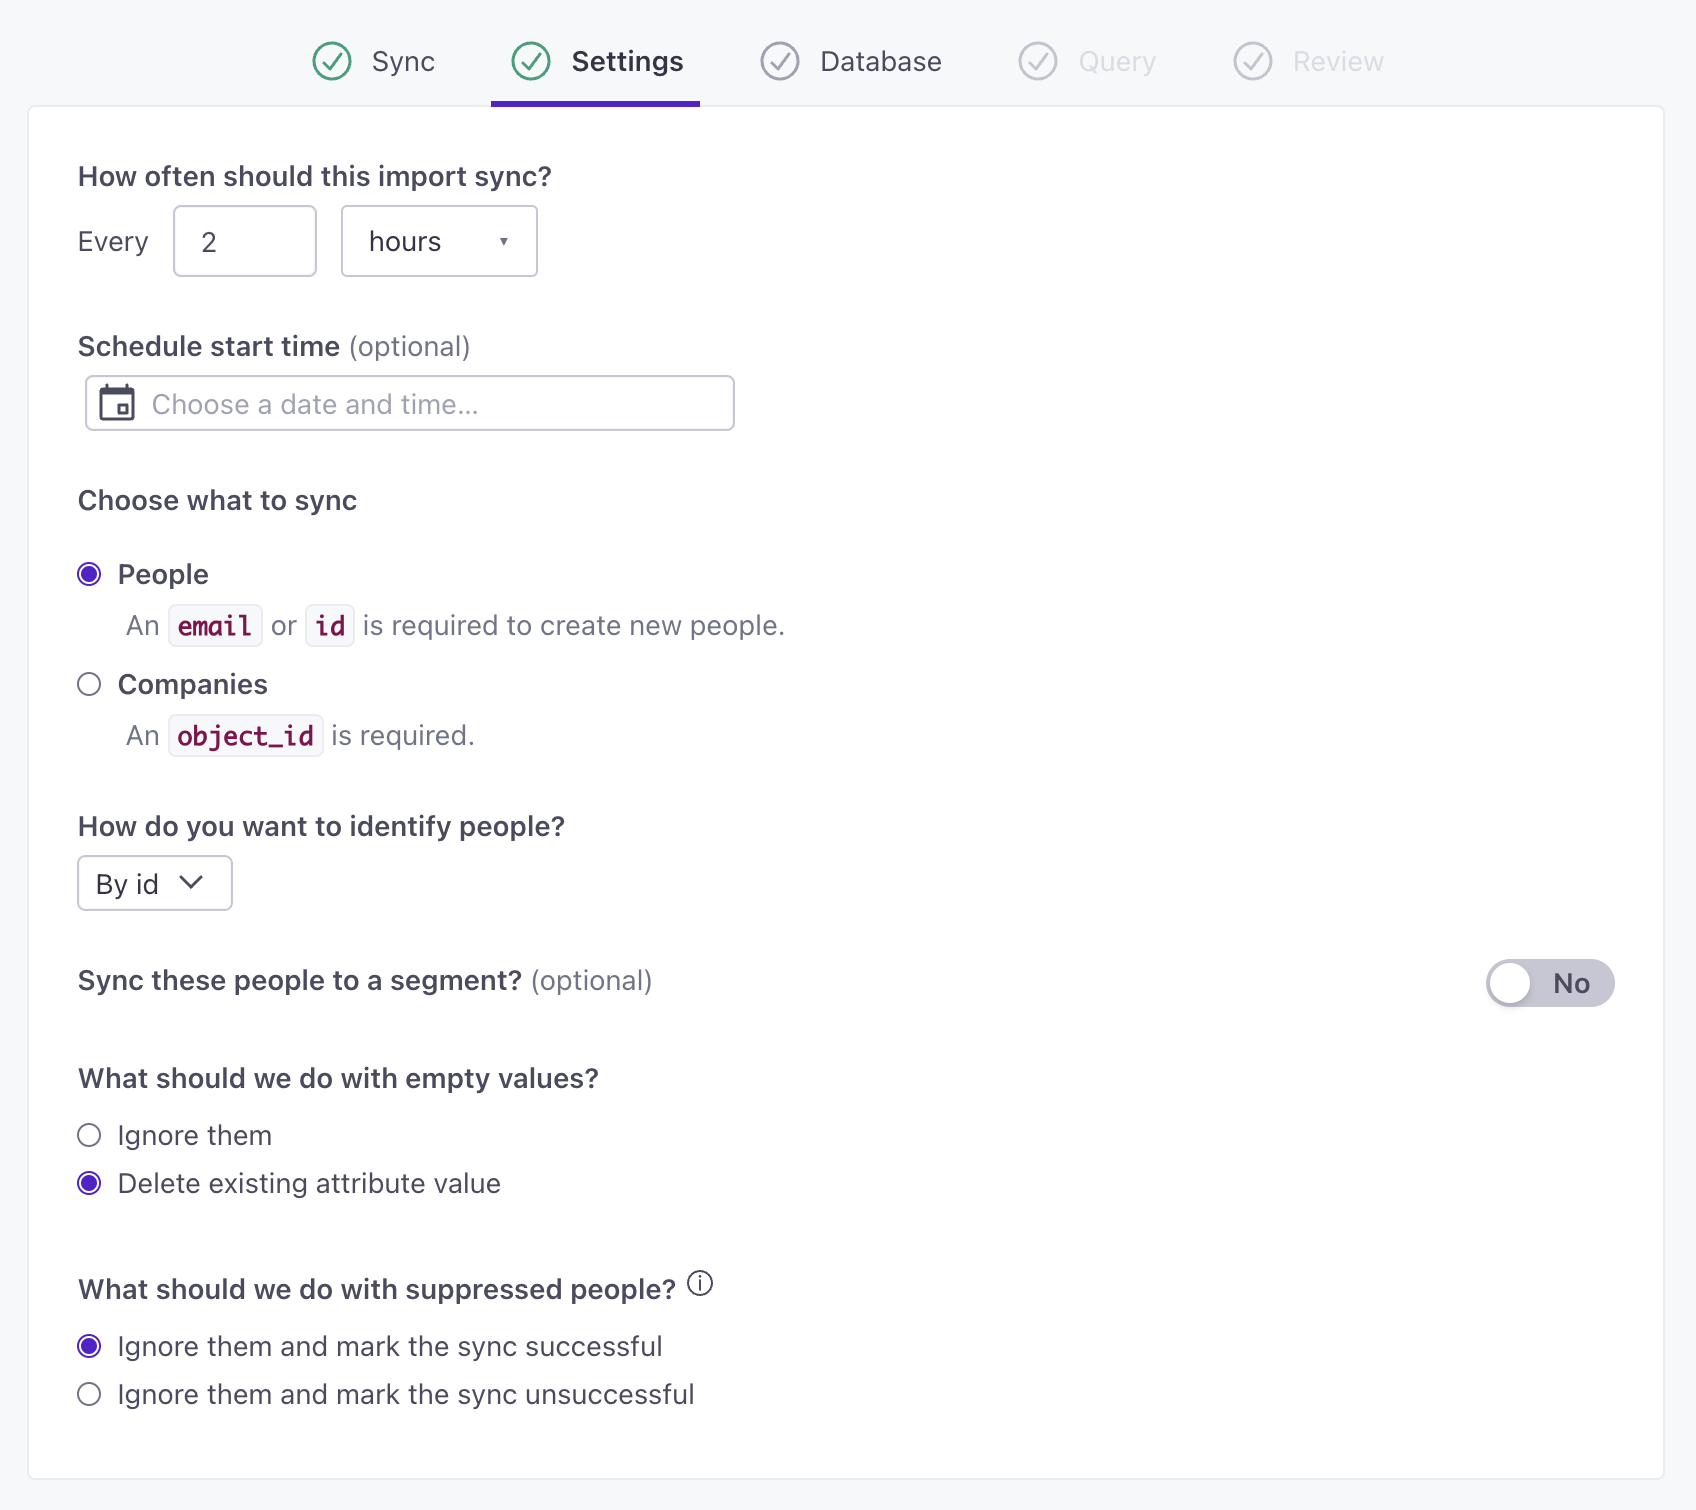
- Enter a Name and Description for your database and click Sync settings. These fields describe your database import for other users in your workspace.

Don’t enter the full domain in the Account field
You only need to provide your Snowflake server’s subdomain in the Account field. For example, if your Snowflake URL is
cio-testing.us-west-2.snowflakecomputing.comthen you should only entercio-testing.us-west-2.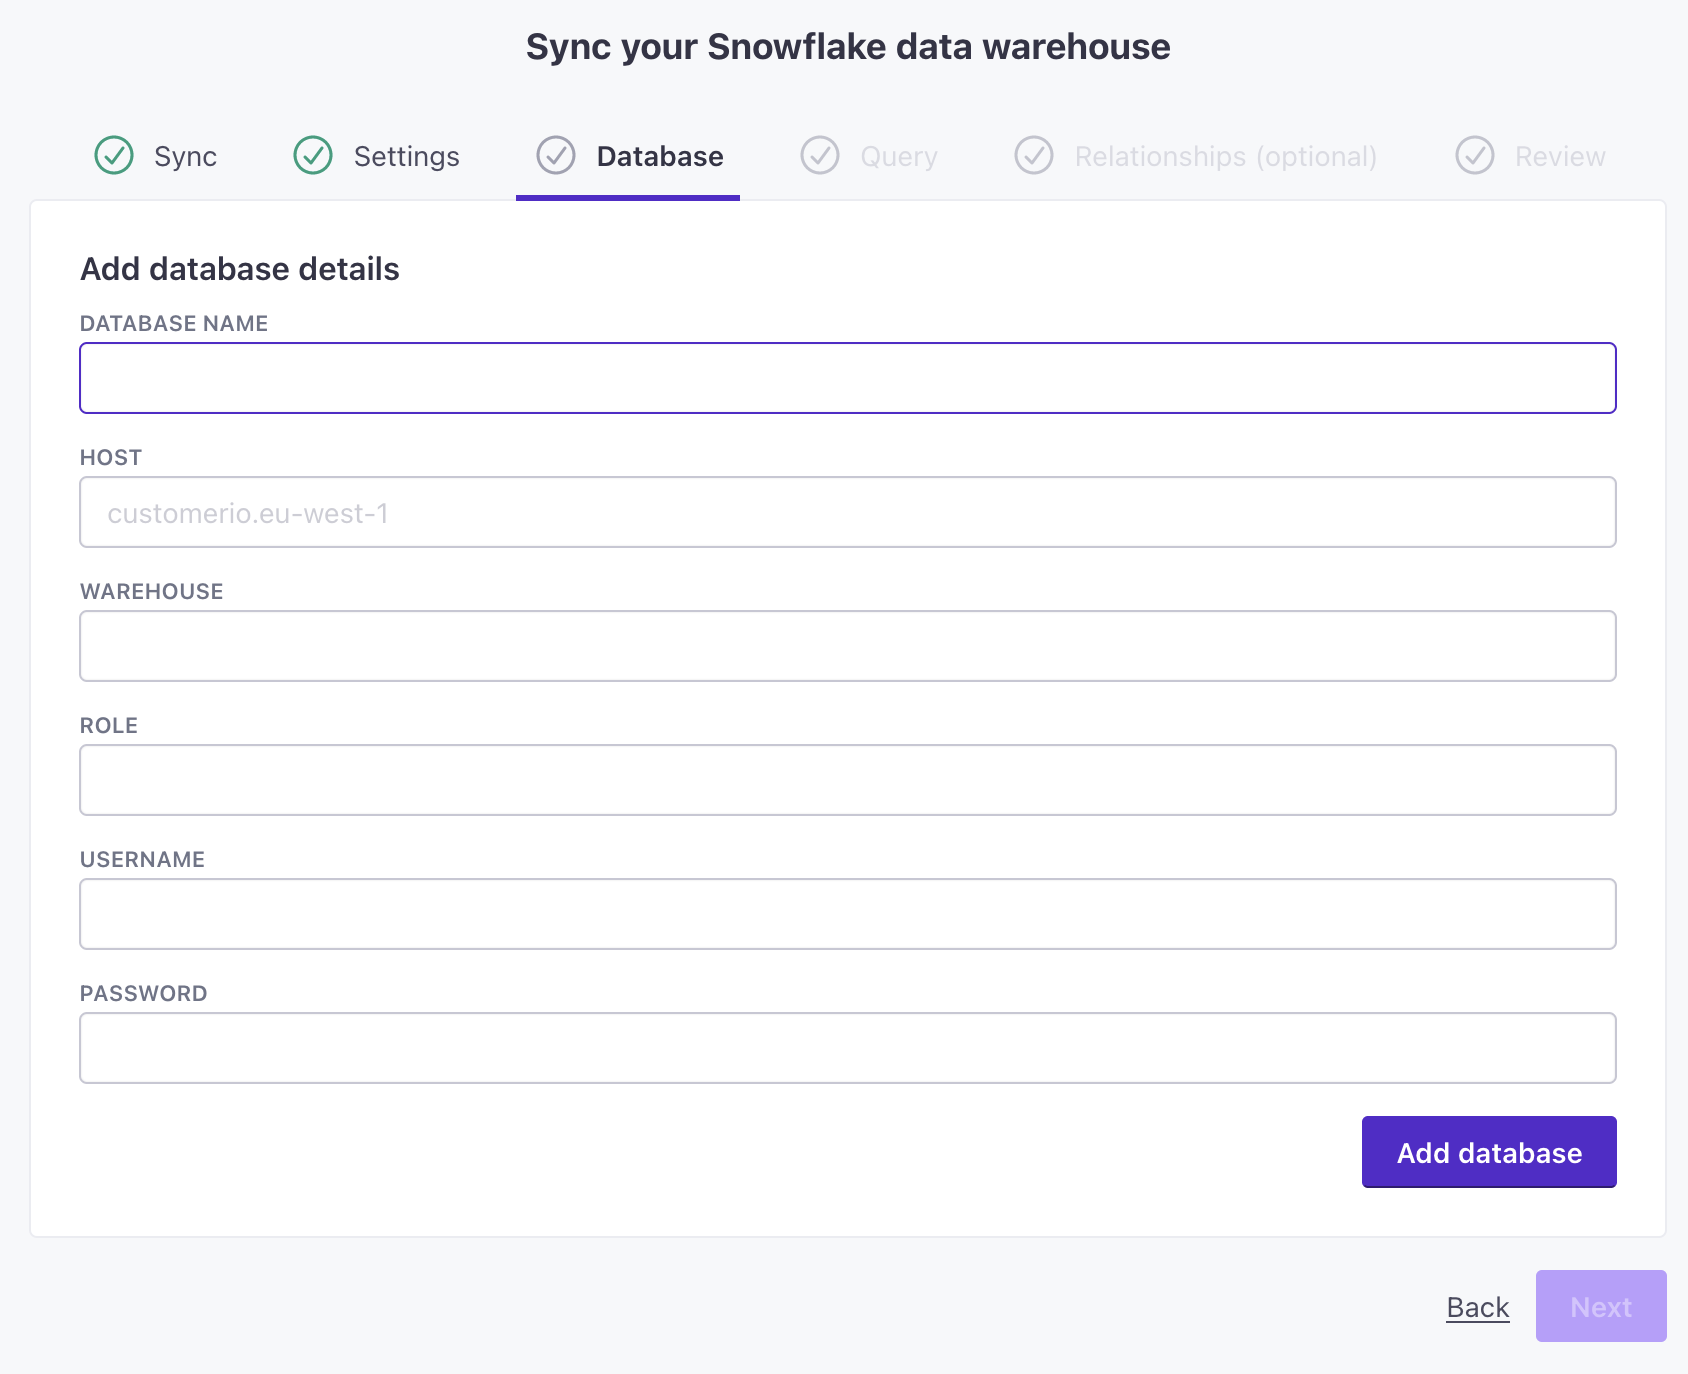

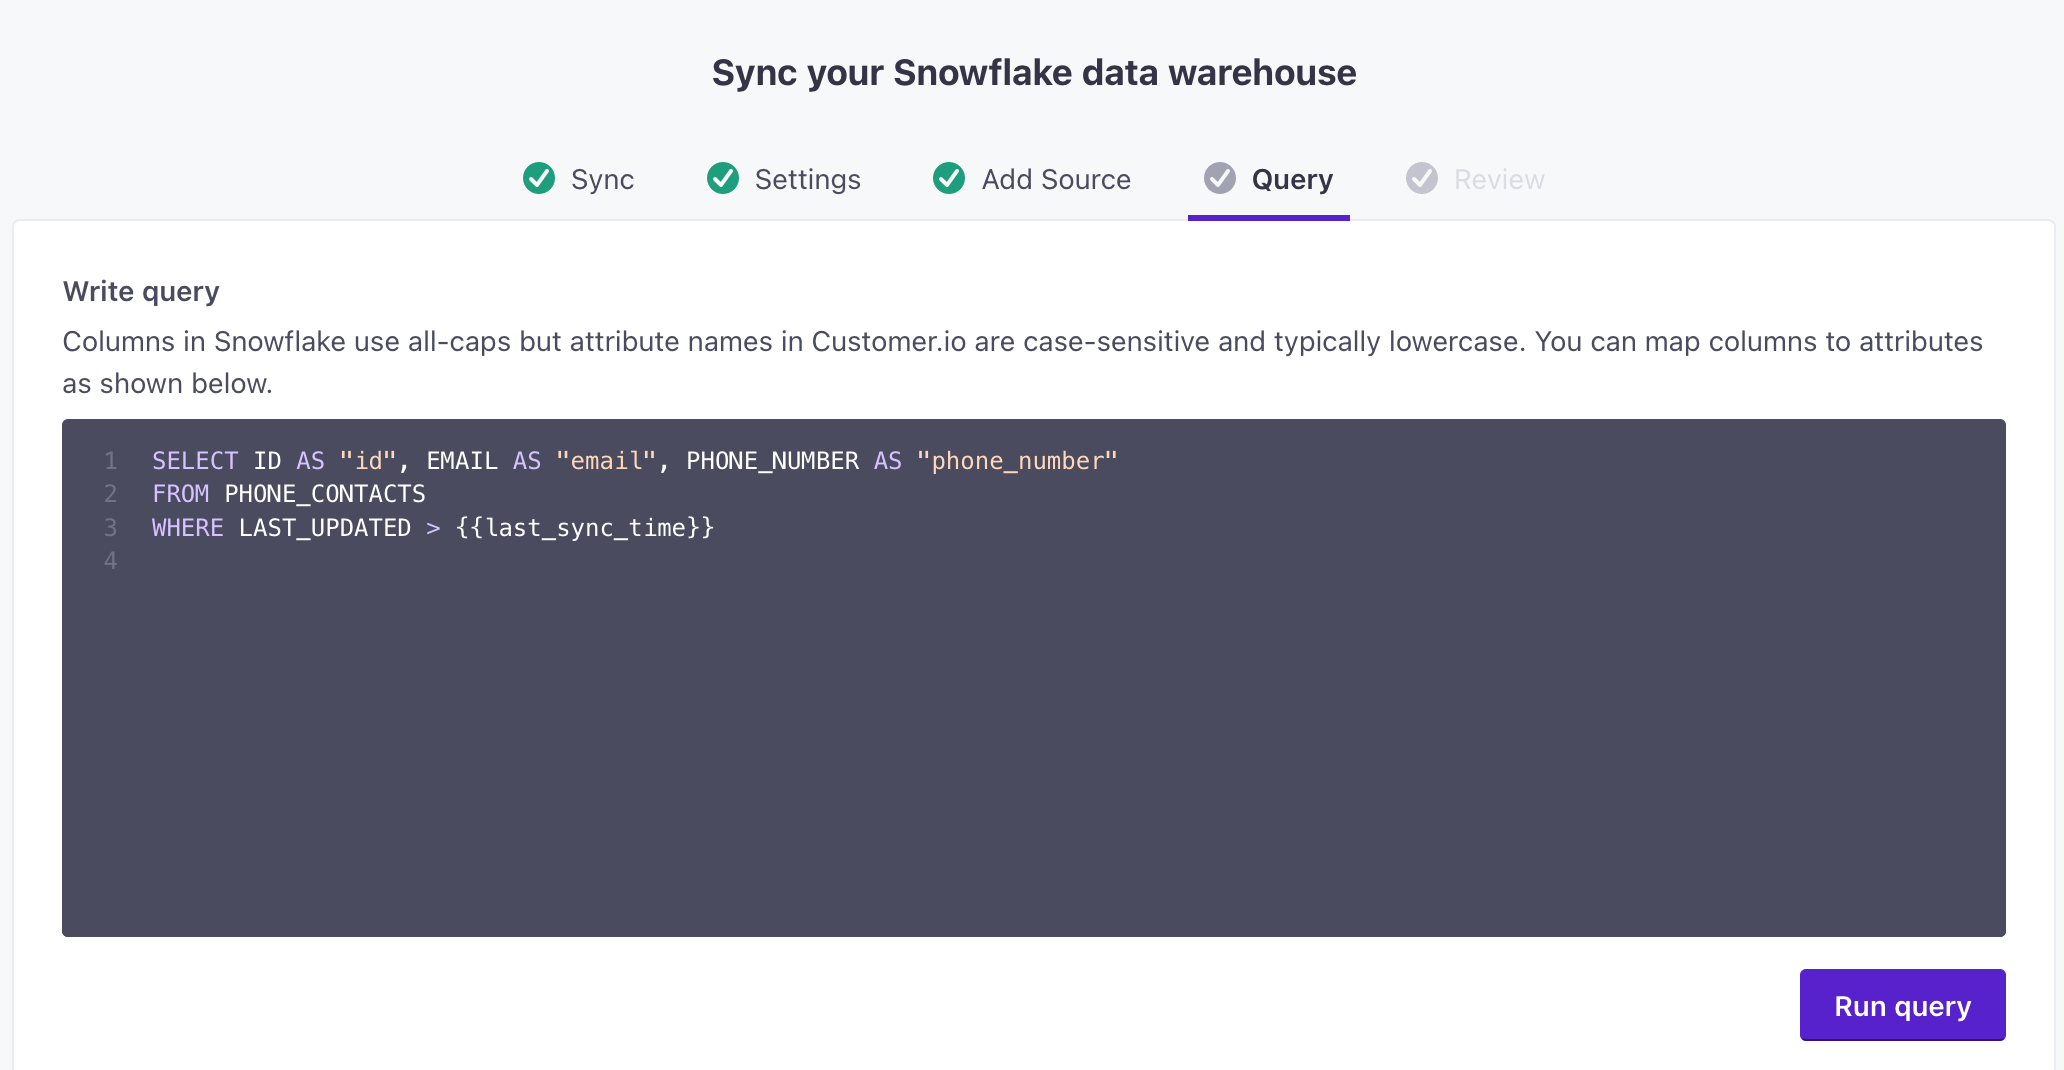

- (Optional) Set up a Relationship Query. If you don’t use our objectsNot to be confused with a JSON object, an object in Customer.io is a non-person entity that you can associate with one or more people—like a company, account, or online course. You can use objects to message people based on changes to their company, account, or course itinerary. feature, you can skip this step. When you set up a relationship query, you have to indicate how you’ll identify people—by
idoremail, regardless of the fields in your query. See Relationship Query below for more information. - Click Review import to review your sync setup.
- Click Set up sync to start the import process.
Relationship Query
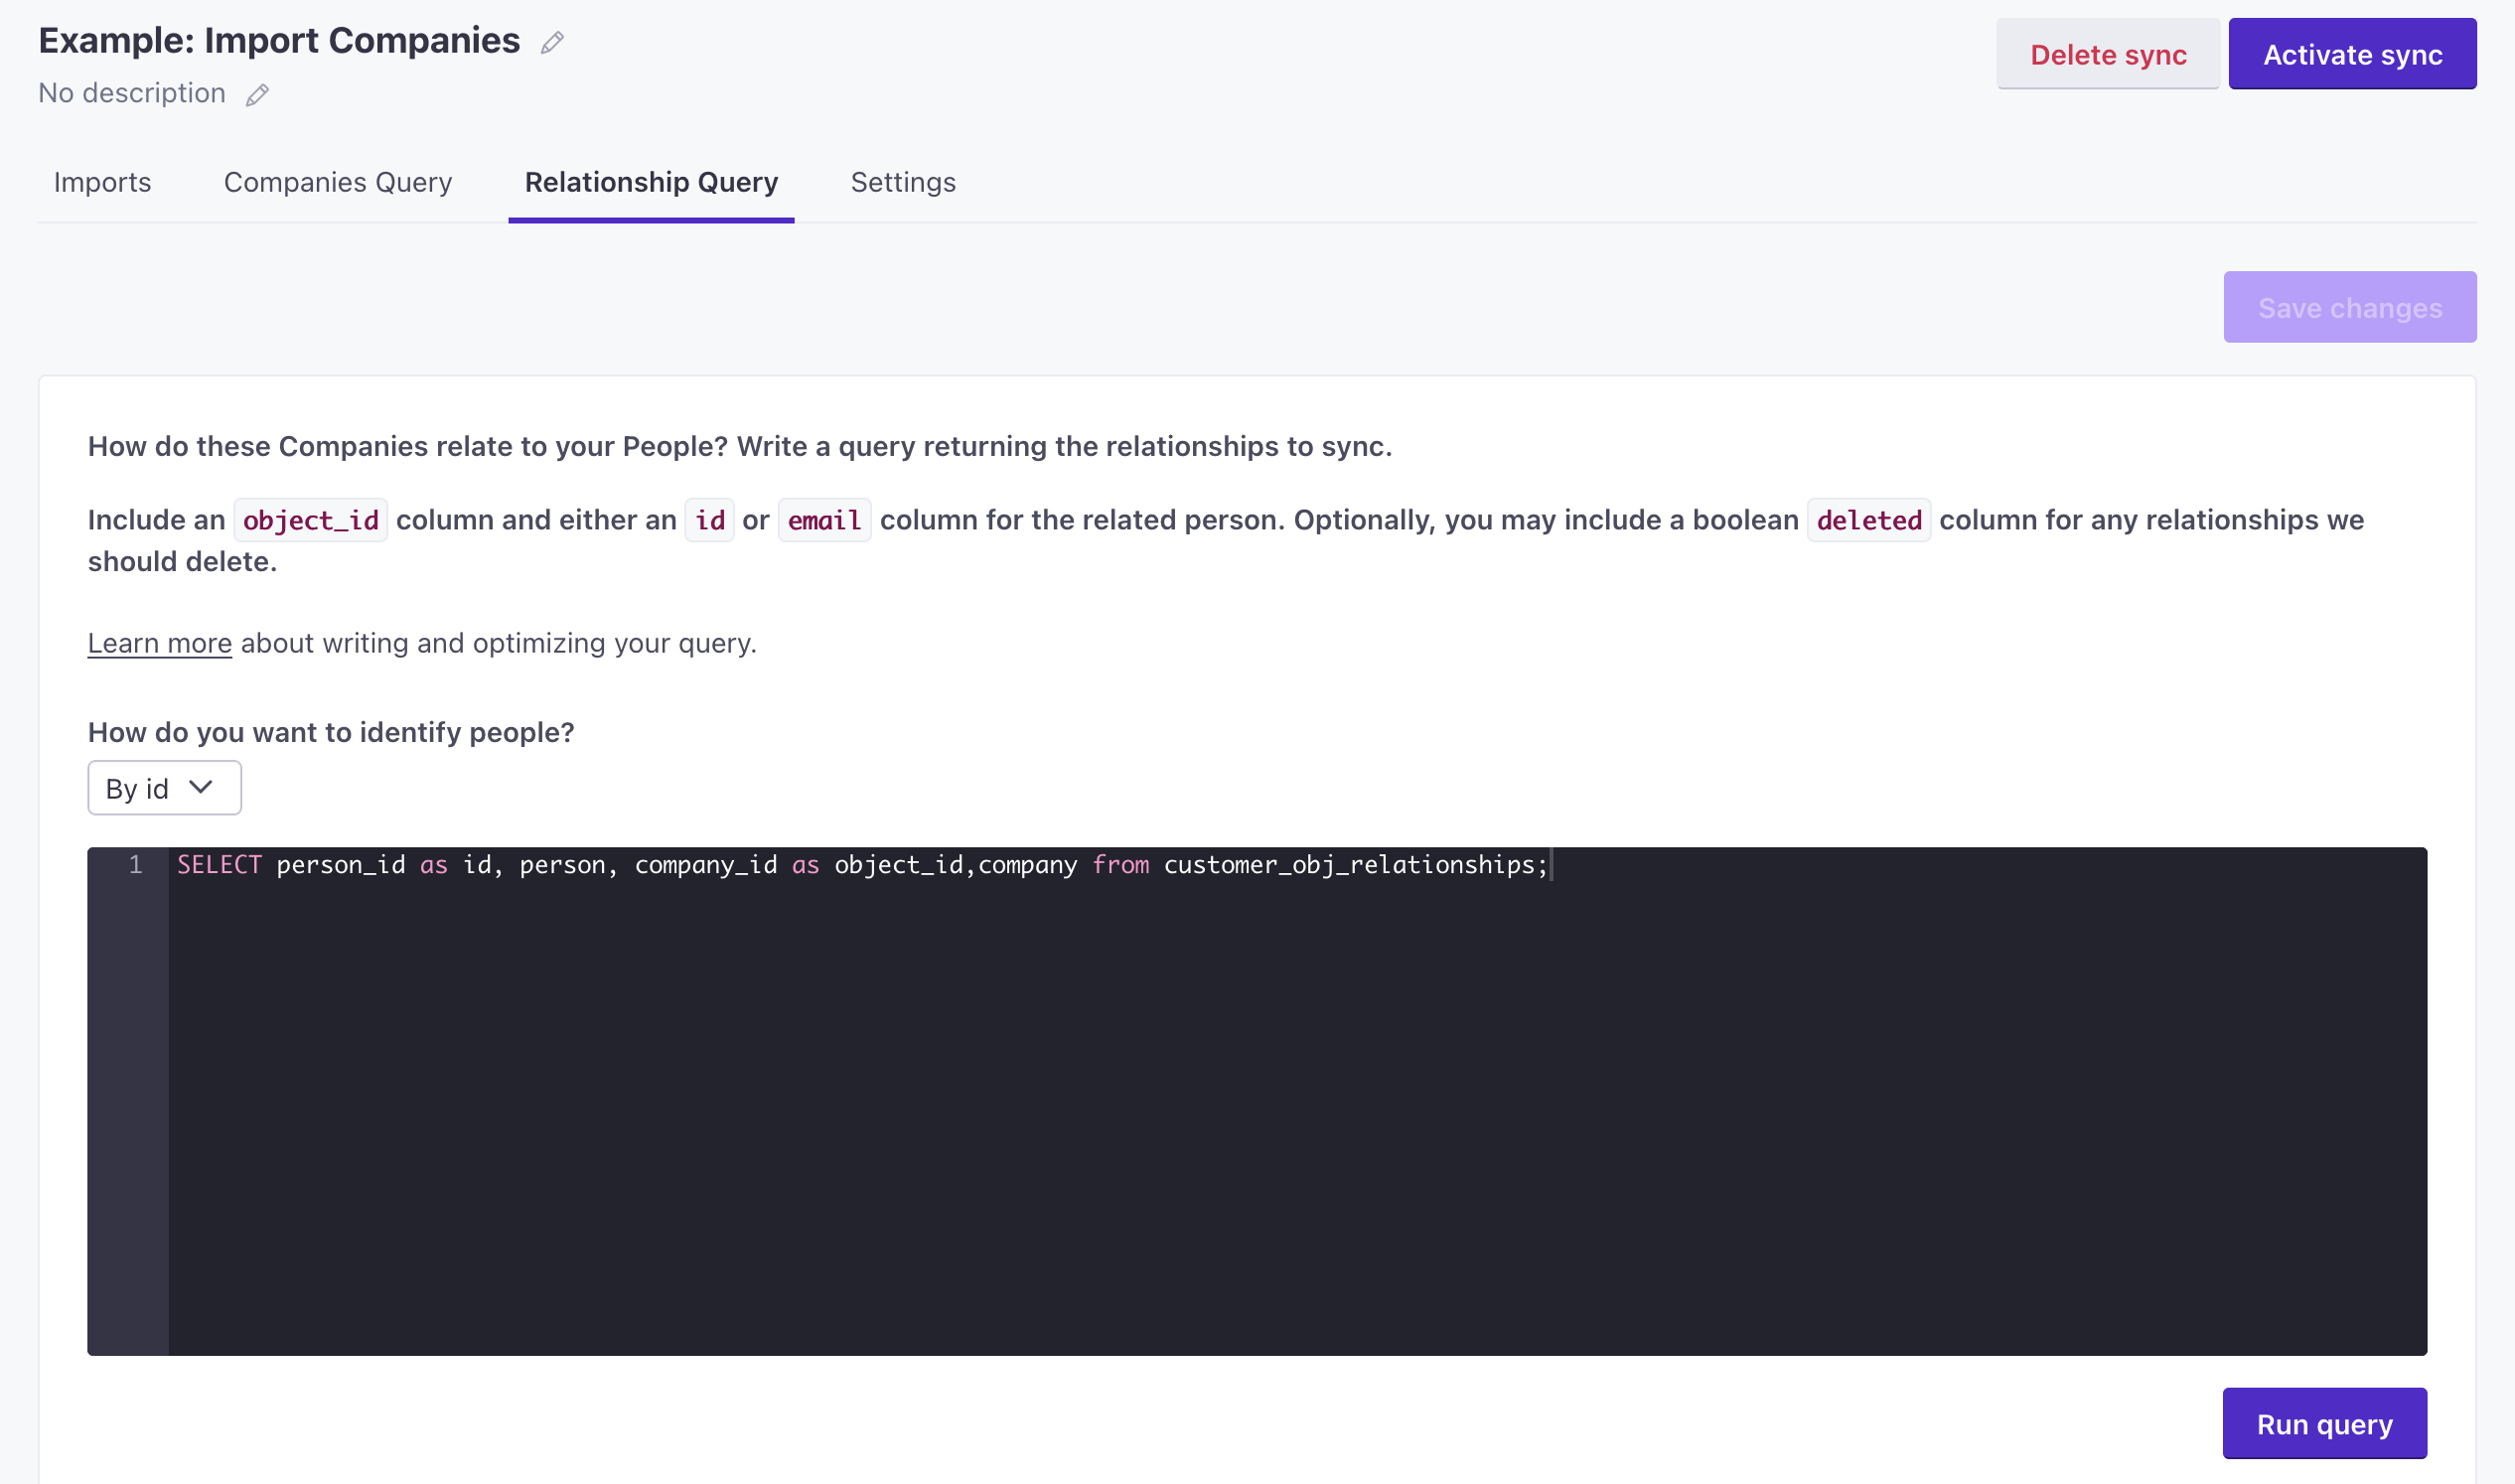
As a part of your sync, you can add a secondary query that imports relationships between people and objectsNot to be confused with a JSON object, an object in Customer.io is a non-person entity that you can associate with one or more people—like a company, account, or online course. You can use objects to message people based on changes to their company, account, or course itinerary.. This query is independent of your initial import; it doesn’t matter whether your initial Query imports people or objects.
Your relationship query must contain one column representing Object IDs and another representing identifiersThe attributes you use to add, modify, and target people. Each unique identifier value represents an individual person in your workspace. for people—one of email or id. By default, each row returned from your query represents a relationship that you want to add. You can also include a boolean column called deleted, where true removes a relationship and false sets the relationship.
SELECT person_id as id, company_id as object_id,
new_relationship_bool as deleted from customer_obj_relationships

Relationship attributes
Relationship attributes are data you can store on the relationship itself, much like you can store attributes on objects and people. If you see relationship attributes in the UI, then your account is set up so you can sync them in your relationship queries:
SELECT person_id as id, company_id as object_id,
new_relationship_bool as deleted from customer_obj_relationships,
attr1, attr2 from customer_obj_relationships
Check the status of a sync
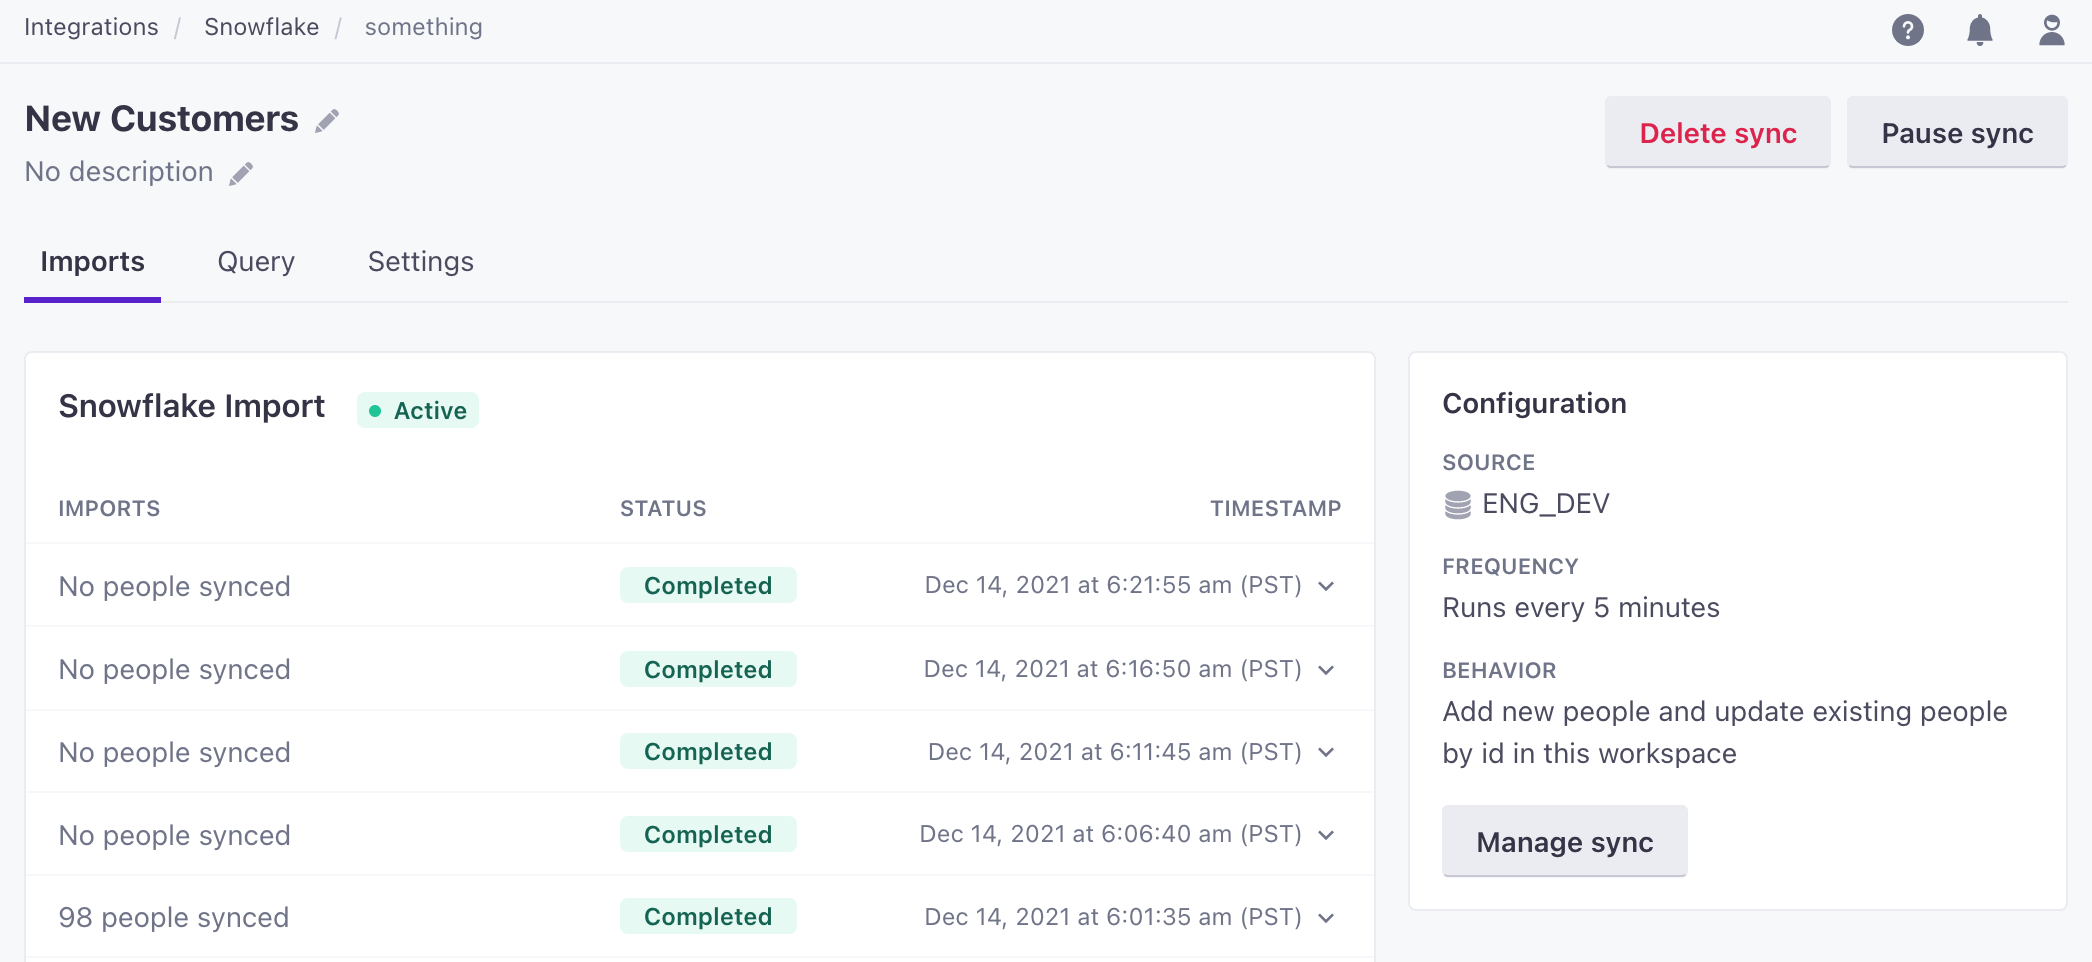
The Imports tab for your integration shows recent sync intervals. Click an interval to see how many people you imported, how long the sync operation took to complete, and other information.
Sync operations will show Failed if the query contained any failed rows. While some rows may have synced normally, we report a failure to help you find and correct individual failures. See Import failures for more information.
- Go to Data & Integrations > Integrations and select Snowflake Data In
- Click the sync you want to check the status of and go to the Imports tab.

Pause or resume a sync
Pausing a sync lets you skip sync intervals, but doesn’t otherwise change your configuration. If you resume a sync after you pause it, your sync will pick up at its next scheduled interval.
- Go to Data & Integrations > Integrations and select Snowflake Data In.
- Click next to the sync you want to modify and select Pause. If your sync is paused and you want to resume it, click Activate.


Update a sync
When you update or change the configuration of a sync, your changes are reflected on the next sync interval.
- Go to Data & Integrations > Integrations and select Snowflake Data In.
- Click the sync you want to update.
- Make your changes. Click between Query and Settings tabs to make changes to different aspects of your sync.
- Click Save Changes.
Delete a sync
Deleting a sync stops syncing/updating people from your database using a particular query. It does not delete or otherwise modify anybody you imported or updated from the database with that query.
- Go to Data & Integrations > Integrations and select Snowflake Data In.
- Click next to your sync and select Delete.
Optimize your query
Because your database sync operates on an interval, you should optimize your query to ensure that we import the right information, quickly, with the least noise. When setting up your query, you should consider:
- Your database timeout value: Queries selecting large data sets may timeout.
- Cost: Are you charged per query or for the amount of data returned?
- Can you narrow your query?: Add a “last_updated” or similar column to tables you import, and index that column. You’ll use this column to select the changeset for each sync.
- How often do you need to sync (frequency)?: Syncing large data sets too frequently can impact your account’s performance. If a sync operation is still in progress when the next sync interval occurs, we’ll skip the sync interval. This generally isn’t an issue. The next operation will pick up any data from the skipped sync, but frequently skipped syncs may indicate that you’re attempting to sync too frequently.
SELECT id AS "id", email AS "email", firstn AS "first_name" , created AS "created_at"
FROM my_table
WHERE last_updated >= {{last_sync_time}}
Last Sync Time
We strongly recommend that you index a column in your database representing the date-time each row was last-updated. The {{last_sync_time}} is a Unix timestamp beginning at 0 for the first sync. When you compare your “last_updated” column to the last sync time, you’ll need to use to_timestamp_ntz{{last_sync_time}} to convert the value to a usable ISO-8601 date-time.
The last sync time is a Unix timestamp representing the date-time when the previous sync started. Comparing a “last-updated” column to this timestamp helps you limit your sync operations to the columns that changed since the previous sync.
If you use ISO date-times, you can convert them to unix timestamps in your query.
SELECT ID as "id", EMAIL as "email", FIRSTN as "first_name", CREATED AS "created_at"
FROM my_table
WHERE last_updated > to_timestamp_ntz({{last_sync_time}})
Mapping columns to attributes
We map column names in your query to attributes in your workspace, exactly as formatted in your query. However, columns in Snowflake are all caps and queries are not case sensitive. You must use AS to map at least your ID and EMAIL columns to people-identifiers in Customer.io.
Attributes in Customer.io are generally lowercased. You should make sure all of your columns map to attributes that already exist in your workspace so that you don’t create duplicate attributes with mismatched cases (i.e. FIRST_NAME and first_name).
SELECT ID AS "id", EMAIL AS "email", PRIMARY_PHONE AS "phone"
FROM people
WHERE last_updated >= {{last_sync_time}}
Sync intervals and ‘skipped’ syncs
You can set up a sync to import from your database on an interval of minutes, hours, days, etc—but we only process one sync operation per workspace at a time. Sync operations cannot occur concurrently in your workspace. If we’re still processing an import operation within your workspace during a sync’s next interval, we’ll skip it and try again at the next interval. Skipped sync operations show a Skipped status in the UI.
For example, let’s say a sync is scheduled for every hour. If the first sync starts at 1:30, then the next sync will start one hour after the last one started, 2:30 in this case. If the last sync is still in progress, the next sync won’t start until the next hour: 3:30pm, 4:30pm, etc.
We tested reverse ETL performance for a MySQL server against an empty workspace with no concurrent operations (API calls, running campaigns, etc) with the following results. Your results may vary if your query is more complex, or your workspace has multiple concurrent, active users during the sync interval.
Adjust your sync intervals to provide significant buffer between syncs and account for concurrent users in your workspace or other operations (active campaigns, segmentation, or other operations that affect your audience).
| Database rows | Database columns | Average sync time (mm:ss) |
|---|---|---|
| 100,000 | 10 | 4:20 |
| 250,000 | 10 | 10:36 |
| 500,000 | 10 | 21:49 |
| 750,000 | 10 | 31:22 |
| 1,000,000 | 10 | 40:39 |
Import failures
Rows that fail to add or update a person report errors. You can find a count of errors with any sync and download a list of errors for failed rows by going to Data & Integrations > Integrations > Snowflake Data In.
If a sync interval contained any failed rows, the operation shows Failed. Rows may still have been imported, but we report a failure so that it’s clear that the sync interval contained at least one failure. Click the row for more information. Click Download to get a CSV file containing errors for each failed row.
If you see Failed Attribute Changes, try changing your workspace settings
Reverse ETL syncs that change a person’s email address can be a frequent source of Failed Attribute Change errors. You can enable the Allow updates to email using ID setting under Settings > Workspace Settings > General Workspace Settings to make it easier to change people’s email values after they are set and avoid Failed Attribute Change errors.
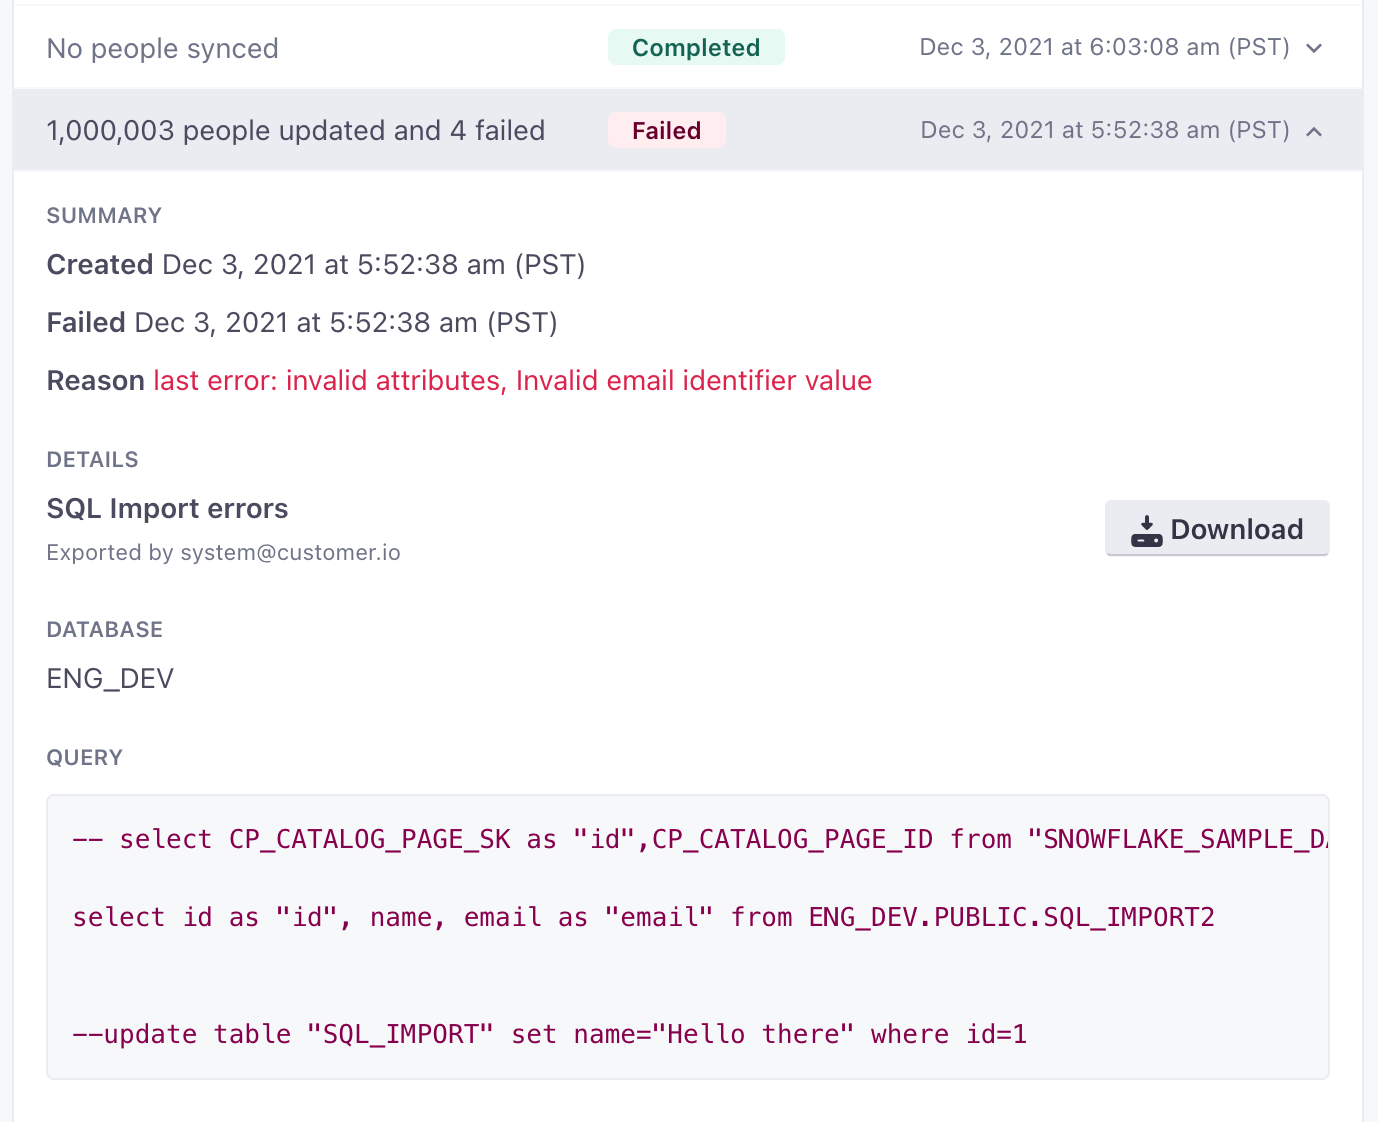

In general, most issues are of the Failed Attribute Change type relating to changes to id or email identifiersThe attributes you use to add, modify, and target people. Each unique identifier value represents an individual person in your workspace.. You are likely to see this error if:
If your workspace identifies people by either You can set an Emails must conform to the RFC 5322 standard. If they do not, you’ll receive an attribute change failure.You set an
id or email value that belongs to another person.email or id, these values must be unique. Attempting to set a value belonging to another person will cause an error.You attempt to change an
id or email value that is already set for a person.id or email if it is blank; you cannot change these values after they are set. You can only change these values from the People page, or when you identify people by cio_idAn identifier for a person that is automatically generated by Customer.io and cannot be changed. This identifier provides a complete, unbroken record of a person across changes to their other identifiers (id, email, etc).), which you cannot use in a Reverse ETL operation.You set an invalid
email value
FAQ
What other databases do you support for import operations?
In addition to Snowflake, we also support MySQL, Postgres, Microsoft SQL, Google BigQuery, and Amazon Redshift. Contact us to let us know if you want us to support another database as a part of our reverse ETL integrations.
Do you support SSL or TLS connections?
We support SSL connections. You can also secure your connection by limiting access to approved IP addresses.
Do you support connections via SSH?
No. We do not support SSH tunneling.
Is there a limit to the number of people I can import at a time?
You should not add or update many millions of people (rows) at a time. Consider adding a LIMIT and ORDER BY to your query, or using a WHERE clause to limit updates to people who have been added or updated since the {{last_sync_time}}. See optimize your query for more information.
Your query cannot SELECT more than 300 columns, where each column represents an attribute.
Contact us if you want to import more rows or columns.

