Set preferences outside of the subscription center
UpdatedA subscription center helps you differentiate between the types of messages you send and lets your audience decide what kinds of campaigns and messages they want to receive. Your customers can update their preferences from within your Customer.io messages or other locations including, but not limited to, account creation.
How it works
Customer.io’s Subscription Center feature lets your audience set their subscription preferences when they click Unsubscribe or Manage your preferences in your messages. But you might want to let your audience proactively manage their preferences as a part of your sign-up flow or elsewhere.
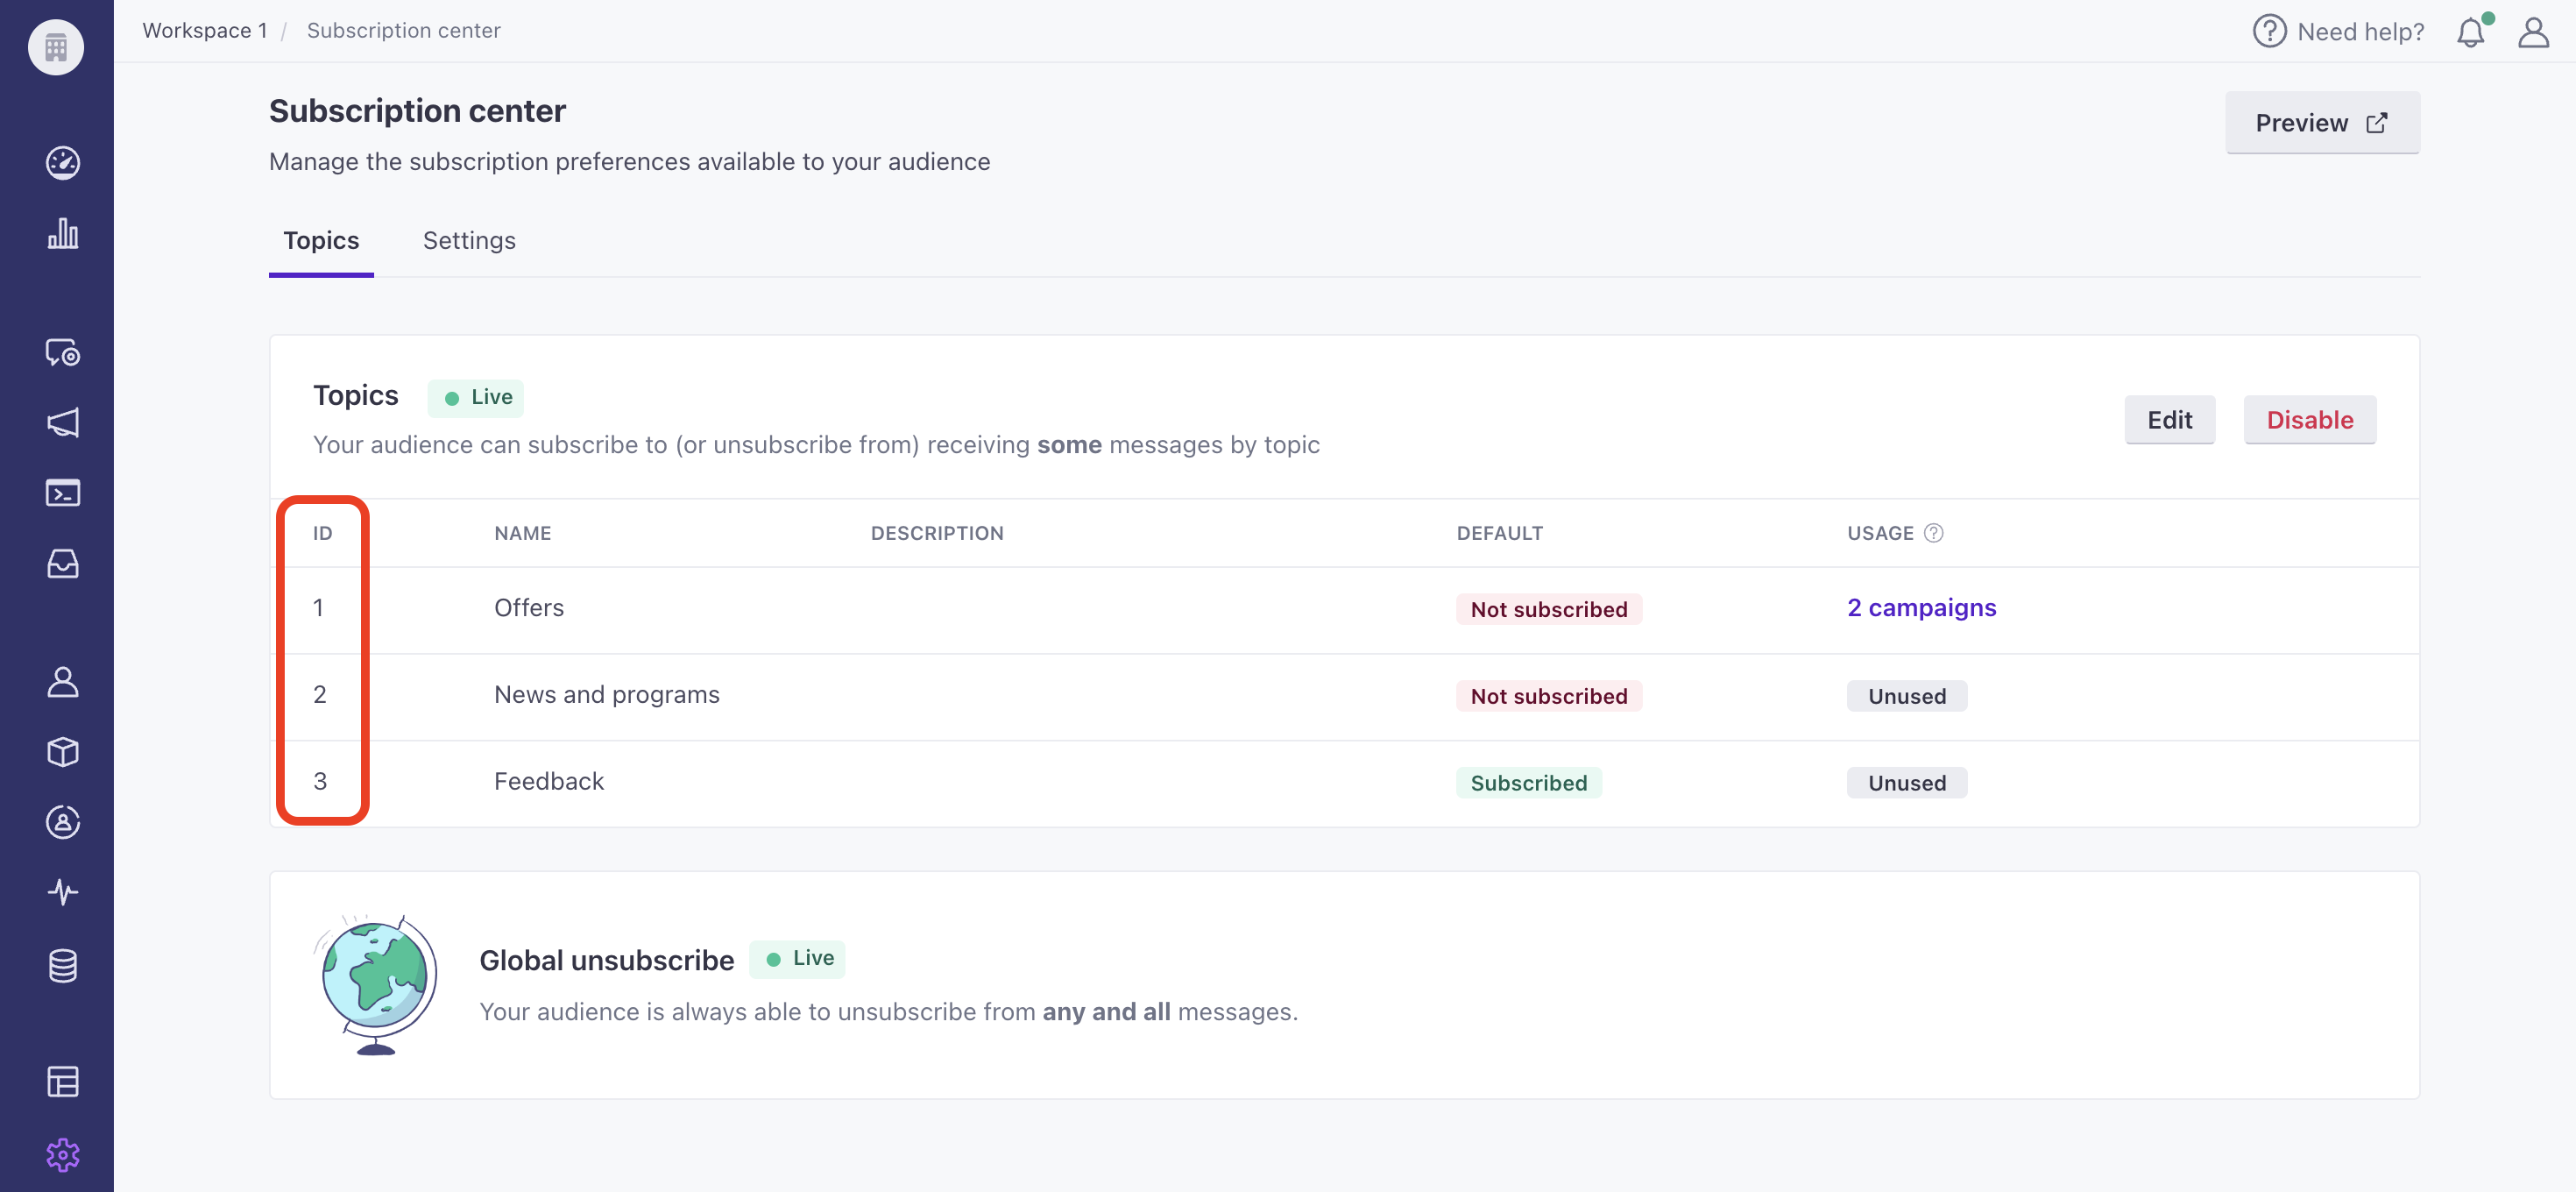
You can set your audience’s subscription preferences using the reserved cio_subscription_preferences attributeA key-value pair that you associate with a person or an object—like a person’s name, the date they were created in your workspace, or a company’s billing date etc. Use attributes to target people and personalize messages. Attributes are analogous to traits in Data Pipelines.. Each topic in the attribute is numbered, based on the ID that you see in the UI—topic_1 corresponds to ID 1 in the left-column in your Subscription Center setup page. We set subscription preferences by topic ID rather than the topic Name, so that you can change the name of a topic without affecting your audience’s preferences. For each topic, true means that a person is subscribed to a topic; false means they’re unsubscribed.
You’ll set this attribute—either through the API, a CSV upload, a Create or Update Person action, or Database sync—to apply preferences to a person.
{
   "cio_subscription_preferences": {
      "topics": {
         "topic_1": true,
         "topic_2": false
      }
   }
}


Check your payload
Applying subscription preferences incorrectly prevents us from observing your audience’s preferences, and can result in extra, misapplied attributes that clutter your workspace.
Your subscription center starts your relationship with your audience on the right foot by letting them tell you which types of messages they’re interested in.
Create a custom subscription preferences page
If you need more flexibility over the branding and location of your subscription preferences page, you can use our App and Track APIs to fetch and update preferences within a page that you host. Use our App API to fetch susbcription preferences for your customers and our Track API to update subscription preferences. You can also set preferences using our Web SDK.
outside Customer.io]-->b subgraph App API direction LR b[fetch preferences
on page load] end b-->c subgraph Track API or Web SDK direction LR c[set preferences when
form is submitted] end
App API: Fetch preferences
You can fetch subscription preferences from your workspace using our App API endpoint: /v1/customers/{customer_id}/subscription_preferences.
const axios = require('axios');

let config = {
  method: 'get',
  maxBodyLength: Infinity,
  url: 'api.customer.io/v1/customers/sdade8@example.com/subscription_preferences?id_type=email',
  headers: {
    'Accept': 'application/json',
    'Authorization': 'Bearer'
  }
};

axios.request(config)
.then((response) => {
  console.log(JSON.stringify(response.data));
})
.catch((error) => {
  console.log(error);
});
API: Set preferences
If you have your own backend integration, you can send subscription preferences to your workspace through our APIs or our libraries.
We’ve provided some examples below. Our Data Pipelines example uses our native Node.JS library, which makes identifying and updating people easy. Our other examples rely on our classic Track v1 and v2 APIs which require a bit more work, but we’ve provided examples to help you. We also offer other source integrations to help you set and update preferences.
Want to preserve preferences with our classic track integrations?
To update some preferences while preserving others, our classic Track API and Javascript snippet require JSON dot notation "cio_subscription_preferences.topics.topic_<topic ID>":<boolean> rather than standard JSON representation.
Setting preferences with the Data Pipelines API preserves other preferences. For example, if there was a topic_4 that was set to true, it would remain true after the update. You can reset all preferences by passing an empty topics object.
analytics.identify({
  userId: '019mr8mf4r',
  cio_subscription_preferences: {
    topics: {
      topic_1: true,
      topic_2: true,
      topic_3: false
    }
  }
});
Javascript/Web SDK: Set preferences
If you use our JavaScript source (which we recommend) or our classic JavaScript SDK, you can set preferences with the identify function. You can identify a person when they first sign up for your service and set their preferences or when they update their preferences in a settings page that you make available to them.
Want to preserve preferences with our classic JavaScript SDK?
To set some preferences, while preserving those set for other topics, you need to use JSON dot notation "cio_subscription_preferences.topics.topic_<topic ID>":<boolean> in your request. To overwrite preferences, you’ll pass the entire cio_subscription_preferences object but you’ll stringify the topics object.
With our Data Pipelines source, you can pass an empty topics object to overwrite a person’s preferences. Otherwise, we’ll preserve the preferences that you don’t update.
analytics.identify({
  userId: '019mr8mf4r',
  cio_subscription_preferences: {
    topics: {
      topic_1: true,
      topic_2: true,
      topic_3: false
    }
  }
});

